https://larougetdelisle.com/blogs/sewing-with-cinnamon.atom larougetdelisle - Sewing With Cinnamon 2023-03-28T14:07:25-07:00 larougetdelisle https://larougetdelisle.com/blogs/sewing-with-cinnamon/miniature-millinery-silly-hats-creating-flower-embellishments 2022-08-23T09:30:02-07:00 2022-08-23T23:46:11-07:00 Miniature Millinery Silly Hats: Creating Flower Embellishments Cinnamon Miles

Follow along to see how to create two types of fabric embellishments for your hats. The first demonstration is showing a tiny rosette created from plastic fabric. The second demonstration shows how to create a pinwheel poof flower made from the plastic fabric scraps.

More

]]>

Follow along to see how to create two types of fabric embellishments for your hats. The first demonstration is showing a tiny rosette created from plastic fabric. The second demonstration shows how to create a pinwheel poof flower made from the plastic fabric scraps.

]]>
https://larougetdelisle.com/blogs/sewing-with-cinnamon/miniature-millinery-silly-hats-applied-designs 2022-08-22T11:00:13-07:00 2022-08-22T11:00:23-07:00 Miniature Millinery Silly Hats: Applied Designs Cinnamon Miles Hi Everyone! In Part 3, Shari takes her bonnet one step further by adding applied designs! Drawing inspiration from the illustrations in the Hungary Caterpillar children's book, these whimsical shapes and elements really add that special touch!

More

]]>

Hi Everyone! In Part 3, Shari takes her bonnet one step further by adding applied designs! Drawing inspiration from the illustrations in the Hungary Caterpillar children's book, these whimsical shapes and elements really add that special touch!

]]>
https://larougetdelisle.com/blogs/sewing-with-cinnamon/miniature-millinery-graduation-caps-creating-keepsake-tassel-toppers 2022-04-26T11:56:01-07:00 2023-08-31T11:27:08-07:00 Miniature Millinery: Graduation Caps Creating Keepsake Tassel Toppers! Cinnamon Miles Hi Everyone! In part four, we wrap up this Miniature Millinery topic with a fun & crafty project highlighting a way to create a personalized graduation cap for your doll or as a memento for someone you know!

More

]]>

Hi Everyone! In part four, we wrap up this Miniature Millinery topic with a fun & crafty project highlighting a way to create a personalized graduation cap for your doll or as a memento for someone you know!

If you've been following along with Shari in parts one through three, then you should have your cap finished and ready to complete with a tassel topper. If you haven't started making your hat yet, you have two choices. You can complete your hat and add the topper as demonstrated here, or you can create your topper and layer it on the top of the hat before attaching the covered button.

In either case, the hat itself is not embellished permanently, which is nice just in case you want to use it for a different reason in the future.

To get started, use the template provided in the Graduation Regalia pattern to cut out a piece of chipboard the same size that the motor board top. This is the piece you will decorate.

Punch a hole in the center large enough to slipover the covered button tightly. 

Now, let's get crafty! Bring out an assortment of scrapbook supplies. Things like, glitter paper, letter stickers, paper flowers, ribbing trims, etc. 

Think through the theme you'd like to create. Is it the school colors combined with a monogram and year? Or Maybe it's a funny play on words, or a tie in to a favorite book, character, or game. The choice is yours! There are some many great ideas out there. Your can search the term "tassel topper" on either google images or Pinterest to get lots of ideas!

For our project, I'm creating a mini version to put into a shadow box from a for my daughter Liberty that's graduating from college this year. She is a screen writing major, so I've chosen to follow a movie industry theme. I have created a 5-inch x 5-inch template on Canva (a great website for creating graphics and documents) with a filling clap board graphic personalized for her experience.

Once it was created, I downloaded it and printed it out, punched a hole in the center and applied it to the glitter paper backdrop. It pops easily over the covered button and it quite adorable - Don't you think?

This hat can be worn by a doll, but for my project I'm finishing it off by styling it into a shadowbox frame to make a cute keepsake to treasure for years to come! After the actual ceremony I can add in some photos and other items from the special day too!

]]>
https://larougetdelisle.com/blogs/sewing-with-cinnamon/miniature-millinery-graduation-caps-making-covered-buttons 2022-04-12T21:31:59-07:00 2023-08-31T11:27:10-07:00 Miniature Millinery: Graduation Caps, Making Covered Buttons Cinnamon Miles Hi Everyone, I'm Shari Fuller from Thimbles and Acorns. Welcome to part two our Miniature Millinery series on the Mortarboard Cap. Follow along as I show you how to make a fabric covered button for your cap!

More

]]>

Hi Everyone, I'm Shari Fuller from Thimbles and Acorns. Welcome to part two our Miniature Millinery series on the Mortarboard Cap. If you look at the top of a mortarboard cap, you will see that there is a small fabric covered button attached to the center of the mortarboard.

Not only does this button add a modest bit of decoration to the otherwise nondescript top, it also has functional purposes in helping secure the top to the cap AND providing a place to hang the tassel from. We'll talk more about the tassels next time. Today, we are going to
focus on making this cloth covered button.

Normally, I would use a cloth covered button blank to make my cloth covered
buttons, however, I moved into a new sewing studio a little while back and now I can't find my box of button blanks. No worries though, this just gives me an opportunity to show you how to make a cloth covered button from a standard shank or flat button.


Materials List

For this Project you will need:

  • Scrap of fabric from your Mortarboard Cap
  • A plain 1/2” wide shank or flat button
  • A plain flat button for inside the cap
  • Thread
  • Buttonhole
  • Thread
  • Needle
  • Round toothpick
  • Tape measure
  • Fabric Marker
  • Scissors

Looking for another use for a cloth covered button? You can find these featured int he Thimbles and Acorns Carrie patterns too!


]]>
https://larougetdelisle.com/blogs/sewing-with-cinnamon/miniature-millinery-graduation-caps-introduction-and-sew-along 2022-04-05T10:44:35-07:00 2023-08-31T11:27:12-07:00 Miniature Millinery: Graduation Caps! Introduction and Sew along Cinnamon Miles Hi Everyone, I'm Shari Fuller from Thimbles and Acorns and I am going to take you on a new miniature millinery adventure – and adventure is a good description since the theme is graduation.

More

]]>

Hi Everyone, I'm Shari Fuller from Thimbles and Acorns and I am going to take you on a new miniature millinery adventure – and adventure is a good description since the theme is graduation. Whether it is from kindergarten, high school, or college, graduation marks the starting point of new life adventures and it is good that we celebrate these milestones with a little pomp and circumstance.

This course will be broken down into 4 installments:

  • In the first video of this series, we will be focusing on making the traditional Mortarboard Cap that has been the crowning glory of graduates everywhere for more than a century.
  • In the second video we will finish up the Mortarboard cap by demonstrating how to make the cloth covered button used to fasten the tassel to the top of the cap using a standard shank or flat button.
  • No cap is complete without a tassel! In the third video we will be showing you how to make a basic tassel as the finishing touch to your mortarboard cap. As long as we are on the topic of tassels, we will also show you how to make a simple self-capped tassel to put on the ends of honor cords.
  • Once the cap is finished, Cinnamon will finish up our topic by demonstrating a variety of ways you can decorate the top of your mortarboard cap to make the celebration more personal.


Before we get started, let's take a look at the history of the mortarboard cap.

Now, let's be honest, these caps aren't exactly high fashion. Worn anywhere outside of a graduation ceremony, they simply look odd. This begs the question, how did these unusual looking caps become the symbol for academic achievement?


The graduation cap as we know it today, has been evolving since the Middle Ages. It started out as a simple skull cap called a pileolus, that was worn by clergy under their more formal head coverings as protection against the cold.


Over the years, the shape of the pileolus evolved into a variety of caps with cornered crowns known as birettas and barret caps. These caps were adopted and worn not only by clergy, but also persons of dignity outside of the church, including women.


Because most higher learning took place in the church, it was only natural that professionals and scholars took to wearing styles of these caps that were most familiar with the clergy as a symbol of learning and scholarship. In 1583 Philip Stubbes wrote that shape of the biretta caps symbolized ‘the whole monarchy of the world, east, west, north and south, the government of which standeth upon them as the cap doth upon their heads’.


The shape of the biretta cap gradually evolved into a soft square cap with a flat top and the square section became wider and stiffer. The cap began to be called a mortarboard because it started to resemble the shape of the flat board used by bricklayers to lay mortar. Soon thereafter, the idea that the cap represented the hard work and knowledge it took to become a master workman was tied to the years of hard work a student put in to build up the knowledge leading to graduation.


For more than 100 years, the mortarboard cap has become a widely used symbol of academia and learning across the globe.


Are you ready to create a scaled down version of this classic cap? Follow along in the video as we construct the cap together!


You can find the Graduation Regalia PDF sewing pattern in the SWC Bonuses Section (or as part of the course on the SWC website), it's included as part of this course! If you'd like to complete the look with the coordinating Graduation Gown, that pattern is available separately.

]]>
https://larougetdelisle.com/blogs/sewing-with-cinnamon/miniature-millinery-the-19th-century-poke-bonnet 2021-07-27T09:25:27-07:00 2021-07-27T09:28:37-07:00 Miniature Millinery: The 19th Century Poke Bonnet Cinnamon Miles Hi Everyone! In Part 4, we wrap up the straw hat series using the crown from our ladies size sun hat to make a doll-size Poke Bonnet. For those of you that aren't historically inclined, you can make a more modern Somerset style sun hat by skipping the last few steps of this tutorial.

More

]]>

Hi Everyone! In Part 4, we wrap up the straw hat series using the crown from our ladies size sun hat to make a doll-size Poke Bonnet. For those of you that aren't historically inclined, you can make a more modern Somerset style sun hat by skipping the last few steps of this tutorial.

Poke bonnets became popular throughout the western world at the beginning
of the 19th century. The crown was designed to contain hair while the brim provided shade to protect the complexion. The size and shape of the crown and brim varied greatly depending on the current trends or more practical considerations. A round, close-fitting poke was popular during the Regency Period. As dress sleeves grew to exaggerated widths in the 1840s so did the brim of the poke bonnet, which mockingly became known as Coal Scuttle Bonnets.

Here's an interesting look at the fashion style of the 19th Century Poke Bonnet, (this image by Nordiska Museet was found on Wikepedia).


As you work on your Poke Bonnet, remember that there is no specific shape you need to achieve. Your crown can be deep or shallow and your brim can be narrow or wide - like a coal scuttle. A big part of what the final crown looks like will depend on how easily the crown of your sun hat takes to molding. Each poke bonnet you make will take on its own unique appearance.


Follow along this week as we continue to learn the art of miniature millinery!


Video notes: 

The Poke Bonnet full instructions are found in the Thimbles and Acorns Three Straw Hats pattern.

The fabric starch used in the tutorial is optional, but recommended as it helps your bonnet and brim keep its shape. You can use purchased fabric starch or you can use this homemade recipe I used in the tutorial:

  • Homemade Fabric Starch For Hats
    • In a saucepan, dissolve 1 Tablespoon of cornstarch in 2 cups of water. Bring to a boil. Cool before using. Increase or decrease the amount of cornstarch for more or less stiffness.


In this tutorial I demonstrate how to apply the braided trim to the bonnet brim on a plain brim. The technique is exactly the same for the bonnet or the plain brim.

Here's a pretty example of a classic Somerset Style Straw hat as seen on Anthropoligie.com webiste. Notice the brim is a full circle all the way around the hat crown. 

Somerset Straw Hat Anthropologie


We hope you've enjoyed this installment of Miniature Millinery! If you're looking for more courses on tiny hat making, check out these other Miniature Millinery courses.  (All the miniature millinery posts are in the same blog section, just scroll backwards to get to the earlier posts).

Miniature Millinery: The Molded Felt Hat

Miniature Millinery: Hip, Hip, Beret!

]]>
https://larougetdelisle.com/blogs/sewing-with-cinnamon/miniature-millinery-soft-crown-regency-bonnet 2021-07-20T07:19:45-07:00 2023-09-02T18:10:25-07:00 Miniature Millinery: Soft Crown Regency Bonnet Cinnamon Miles Hi Everyone! In Part 3 of this straw hat topic, we will continue with the series of projects reshaping full-size straw hats into doll-sizes straw hats. In this next demonstration Shari will be introducing you to a bit of historical costuming by using the other half of the brim from her ladies size sun hat to make a Soft Crown Regency Bonnet.

More

]]>
 

Hi Everyone! In Part 3 of this straw hat topic, we will continue with the series of projects reshaping full-size straw hats into doll-sizes straw hats. In this next demonstration Shari will be introducing you to a bit of historical costuming by using the other half of the brim from her ladies size sun hat to make a Soft Crown Regency Bonnet.

Up until the mid-20th century, ladies wore hats or bonnets outdoors as a matter of course. Aside from sheltering delicate skin from the sun or hair from the elements, hats and bonnets denoted one's class and economic status, as well as one’s marital status. Soft Crown Regency Bonnets were a defining head covering of the Regency period. Jane Austen brought the romantic imagery of the time to life, and one can hardly imagine her simple and unaffected heroines dressed in anything other than these quaint and unpretentious bonnets. The simple elegance of the Soft Crown Regency Bonnet made fashionable head wear easy to achieve for anyone as a lovely hat could be made from the simplest of fabrics and a straw brim. With a little ingenuity and some sumptuous fabric, this simple design could be quite stunning.

Follow along this week as we continue to learn the art of miniature millinery!

Soft Crown Regency Bonnet Tutorial

(As mentioned prior) The new Thimbles and Acorns Three Straw Hats pattern includes the pattern pieces for this project along with the full step by step photos and instruction. We encourage you to download the pattern (use your July coupon code found on the SWC Bonuses page), print out the pattern piece, and follow along as Shari demonstrates how easy it is to create this hat for your 18-inch doll.

If you're interested in resizing this hat to fit a different size doll, check out the How To resize A Hat Pattern For Any Doll post from the Hip, Hip, Beret topic.


For this project we will be using part of the hat brim to make the visor (the other half). This information showing how to procure & prep your straw hat is posted here, if you haven't done this part yet, you will need to do this first.


Looking for the right dress to pair with your new bonnet? Be sure to check out the Regency Era Fashions Collection on larougetdelisle!


]]>
https://larougetdelisle.com/blogs/sewing-with-cinnamon/miniature-millinery-the-summery-sun-visor 2021-07-13T08:54:46-07:00 2023-09-02T18:10:27-07:00 Miniature Millinery: The Summery Sun Visor Cinnamon Miles 
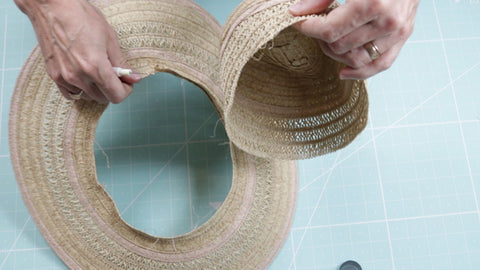
Hi Everyone! In Part 2 we begin a series of projects where we will be experimenting with reshaping full size straw hats to make doll size hats! Follow along as Shari demonstrates how to take one full size ladies hat to make 3 different doll size hats! In this first demonstration we will be using half a brim to make a Summery Sun Visor.

More

]]>

Hi Everyone! In Part 2 of our straw hat topic, we are going to begin a series of projects where we will be experimenting with reshaping full-size straw hats to make doll-sizes straw hats. Follow Shari over the next three weeks to see how she uses one full-size ladies straw sun hat to make three different doll-size hats! In this first demonstration she will be using half of the brim from the ladies sun hat to make a simple Summery Sun Visor. Next week she will use the other half of the brim to make a Soft Crown Regency Bonnet. For her final project, she will show you how to reshape the crown of the sun hat to make a simple doll-size straw hat that can easily be transformed into a Victorian era Poke Bonnet! 

Now let's get started on the Summery Sun Visor!

Summer Sun Visor Tutorial

The new Thimbles and Acorns Three Straw Hats pattern includes the pattern pieces for this project along with the full step by step photos and instruction. We encourage you to download the pattern (use your July coupon code found on the SWC Bonuses page), print out the pattern piece, and follow along as Shari demonstrates how easy it is to create this hat for your 18-inch doll.

If you're interested in resizing this hat to fit a different size doll, check out the How To resize A Hat Pattern For Any Doll post from the Hip, Hip, Beret topic.


For this project we will be using part of the hat brim to make the visor. This information was posted a few weeks ago, but if you haven't done this part yet, you will need to do this first.

 More info on finding and preparing your Straw Hat

  •  You will need to procure and prepare a few specific supplies.
  • There are some instructions below showing how to prepare your hat for use, but you can save those steps for later if you want to watch a video to see this done in more detail. For right now, we recommend you look for a hat to use! We found ours at Kohls for just $15, but you can look at places like Wal-Mart, Goodwill, Thrift shops, Garage sales, etc. Maybe even the Dollar Store!
  • Choosing Your Hat: After collecting an assortment of straw hats from thrift shops and department stores, I quickly learned that all straw hats are NOT created equal. Real straw hats can be reshaped to some degree, but they are not as pliable as hats made from paper raffia straw. Paper raffia straw hats are woven with thin strips of paper raffia that is often strengthened with a thin strand of polyester filament. These hats are usually lighter in weight and respond well to reshaping, especially those that don't have the polyester filament woven into them. Plastic raffia straw hats are similar to paper raffia straw hats - only plastic. These hats are not recommended for these projects because they won't stand up to the heat and steam used in
    the shaping process.
  • Consider all the characteristics of the hat you are working with as you decide on the style of doll hat you want to make. Look for different weaves and consider how they can be incorporated in your project. Depending on the style of straw hat you want to make for your doll, child size hat crowns usually work best for straw bonnets whereas adult size brims work better for most visor type hats. This is a great project to repurpose thrift shop or dollar store straw hats.
  • Preparing Your Hat: Remove the hat band and any embellishments from your hat. 
Separate the crown from the brim by removing the stitching from the row of braid about 1/2” up from the brim. Most straw hats are sewn together with a looped stitch which can be undone simply by pulling the thread. If not, use a seam ripper to remove the stitching. Cut the braid to finish the separating.
  • Cleaning Your Hat: If your hat is soiled from use, take the time to gently hand wash the crown and the brim in warm soapy water. Rinse well. Lay the brim flat and allow to dry. The crown does not need to dry before starting the hat or bonnet project.
  • Saving Braid For Trim: Carefully remove a few rows of braid from the outside edge of the brim and the lower edge of the crown to trim the brim of the doll hat. You will need two 15” lengths each for the Summery Sun Visor and Soft Crown Regency Bonnet and two 18” lengths for the Poke Bonnet.
  • Choosing Your hat Mold: For this project I found that a 4” - 5” diameter Terra Cotta flower pot gave me just the right size and shape for the hat I wanted to make and the surface of the pot provided a solid surface to work on. (This is needed for the Poke Bonnet).
Similarly sized and shaped plastic containers, like yogurt or sour cream containers, also work well. I also found that stacking the container for my hat mold on top of a slightly larger plastic container worked nicely to raise my hat mold up off my work surface, making it easier to work. DO NOT use metal containers for your hat mold as they are liable to create rust stains on your hat during the drying process.
]]>
https://larougetdelisle.com/blogs/sewing-with-cinnamon/miniature-millinery-the-straw-hat 2021-07-06T09:43:38-07:00 2023-09-02T18:10:28-07:00 Miniature Millinery: The Straw Hat Cinnamon Miles Hi Everyone! Welcome to another installment of the Miniature Millinery series. In this course we will be looking at how to make straw hats in miniature. Shari Fuller is joining us again and has several ingenious tutorials to share with us, simplifying the process by using up-cycled materials to create your pieces!

More

]]>

Hi Everyone! Welcome to another installment of the Miniature Millinery series. In this course we will be looking at how to make straw hats in miniature. Shari Fuller is joining us again and has several ingenious tutorials to share with us, simplifying the process by using up-cycled materials to create your pieces!

As a reminder, you can find the July coupon codes posted in the SWC Bonuses Section.

The topic will be divided into four parts. 

For this topic you will need a few supplies ahead of time if you want to follow along with the tutorials, the main ones being a straw placemat and a human size straw hat. Visit the full "supplies overview" post here to read more.

  • For Week 1, Shari will show us how to turn a (paper straw) Braided Circle  Placemat into a darling set of girl and doll matching hats!
  • For Weeks 2, 3, and 4;  We will be experimenting with reshaping full-size raffia straw hats to make doll-size hats. In the demonstrations, we will be
    using one ladies sun hat to make three different doll-size hats. There will also be a new pattern released to go along with these tutorials.

Are you ready for the first project? Let's get started!

How To Make 18th Century Straw Hats For Girls and Dolls

Supplies Needed

  • One Braided Circle Placemat
  • Thread
  • Pins and Needle
  • Scissors
  • Girl-Size Hat
    • 10” - 12” Diameter Fabric Circle
    • 3 yards 1 1/2” Wide Ribbon (three 18”
    • lengths and one 54” length)
  • Doll-Size Hat
    • 5” – 6” Diameter Fabric Circle
    • 2 yards 1” Wide Ribbon (three 12”
    • lengths and one 36” length)


Step 1: Remove the stitching from the row of braid 3” from the center of the placemat Most mats are sewn together with a looped stitch which can be undone by pulling the thread.


Step 2: Cut the braid to separate the center circle from the larger outside circle.


Step 3: Remove the stitching from the row of braid 1 1/4” from the center circle.


Step 4: Cut the braid to separate the center circle from the larger outside circle.


Step 5: The large circle will be the brim for the girl's hat and the small circle will be the brim for the doll's.


Step 6: Tack the loose ends of the braid in place on each circle. Be sure to catch the thread loop on the braid in the stitching to keep it from unraveling.


Step 7: For both hats, turn the edge of the matching fabric circle under ¼ inch and whipstitch over the folded edge. These stitches should be between 1/4” and 1/2” wide as they will be drawn to gather the fabric.


Step 8: Draw up the stitching on the fabric circle to fit inside the matching brim, arranging the fullness evenly.


Step 9: Working from the bottom of the hat, whipstitch the edge of the fabric circle to the inside edge of the matching brim.


Step 10: Turn an end of two of the shorter lengths of ribbon under and pin on opposite sides at the base of the crown. Angle the ribbons slightly toward the back of the hat. Stitch to secure.


Step 11: Baste a wide zigzag along the length of the longer piece of ribbon. Be sure to cut your thread long enough to stitch the entire length.


Step 12: Draw up the basting stitch on the ribbon to create a scalloped ruffle long enough to wrap around the base of the hat crown.


Step 13: Tack the scalloped ribbon to the base of the crown, turning the raw ends under to hide.


Step 14: Turn the back of the hat brim up and tack to secure.


Step 15: Make a bow with the remaining piece of ribbon and tack to the back of the brim.

And your 18th Century hat is finished! Follow these same instructions and the measurements for the Girls' size hat to make the matching look in a larger size too!

]]>
https://larougetdelisle.com/blogs/sewing-with-cinnamon/summer-2021-updates 2021-06-29T08:23:12-07:00 2023-09-02T18:10:29-07:00 Summer 2021 Updates and a Peek at Miniature Millinery: Straw Hats Cinnamon Miles

Hi Everyone! Summer is here! Yay! We hope you are able to get out and enjoy the great outdoors, but of course still find a little time to get to those sewing projects too! The good news is, if you miss any of the content posted her in Sewing With Cinnamon, you can revisit it at ay time in the future when the time is right. Read more to get all our Summer 2021 updates...

More

]]>

Hi Everyone!

Summer is here! Yay! We hope you are able to get out and enjoy the great outdoors, but of course still find a little time to get to those sewing projects too! The good news is, if you miss any of the content posted here in Sewing With Cinnamon, you can revisit it at ay time in the future when the time is right.

This is the 5th Tuesday of the month, so we don't have new content to post, but we do have a few updates to share and a bit of info for the July topic to give you time to gather up the necessary supplies.

Update #1: We are postponing our Fairytale Wedding Theme once again, so sorry, but we're just not as prepared as we'd like to be for this one so we are going to push it back a bit. In August we will feature "Sewing With Zero Waste". This topic will highlight the use of design that eliminates excess fabric waste. It'll be fun and interesting to focus on. We will also include fun and easy projects to use up those tiny scrap fabrics!

Update #2: Our July topic is another installment of Miniature Millinery with Shari Fuller - Yay! The topic will kick off on Tuesday July 5th. This time we are going to focus on making straw hats in miniature. The most interesting part is that it's also an upcycling technique that produces a few adorable miniature straw hat designs! For this topic you will need a few supplies ahead of time if you want to follow along with the tutorials, the main ones being a straw placemat and a human size straw hat.

  • For Week 1, Shari will show us how to turn a (paper straw) Braided Circle  Placemat into a darling set of girl and doll matching hats!

  • For Weeks 2, 3, and 4;  We will be experimenting with reshaping full-size raffia straw hats to make doll-size hats. In the demonstrations, we will be
    using one ladies sun hat to make three different doll-size hats.
  • In the meantime, you will need to procure and prepare a few specific
    supplies.
  • There are some instructions below showing how to prepare your hat for use, but you can save those steps for later if you want to watch a video to see this done in more detail. For right now, we recommend you look for a hat to use! We found ours at Kohls for just $15, but you can look at places like Wal-Mart, Goodwill, Thrift shops, Garage sales, etc. Maybe even the Dollar Store!
  • Choosing Your Hat: After collecting an assortment of straw hats from thrift shops and department stores, I quickly learned that all straw hats are NOT created equal. Real straw hats can be reshaped to some degree, but they are not as pliable as hats made from paper raffia straw. Paper raffia straw hats are woven with thin strips of paper raffia that is often strengthened with a thin strand of polyester filament. These hats are usually lighter in weight and respond well to reshaping, especially those that don't have the polyester filament woven into them. Plastic raffia straw hats are similar to paper raffia straw hats - only plastic. These hats are not recommended for these projects because they won't stand up to the heat and steam used in
    the shaping process.
  • Consider all the characteristics of the hat you are working with as you decide on the style of doll hat you want to make. Look for different weaves and consider how they can be incorporated in your project. Depending on the style of straw hat you want to make for your doll, child size hat crowns usually work best for straw bonnets whereas adult size brims work better for most visor type hats. This is a great project to repurpose thrift shop or dollar store straw hats.
  • Preparing Your Hat: Remove the hat band and any embellishments from your hat. 
Separate the crown from the brim by removing the stitching from the row of braid about 1/2” up from the brim. Most straw hats are sewn together with a looped stitch which can be undone simply by pulling the thread. If not, use a seam ripper to remove the stitching. Cut the braid to finish the separating.
  • Cleaning Your Hat: If your hat is soiled from use, take the time to gently hand wash the crown and the brim in warm soapy water. Rinse well. Lay the brim flat and allow to dry. The crown does not need to dry before starting the hat or bonnet project.
  • Saving Braid For Trim: Carefully remove a few rows of braid from the outside edge of the brim and the lower edge of the crown to trim the brim of the doll hat. You will need two 15” lengths each for the Summery Sun Visor and Soft Crown Regency Bonnet and two 18” lengths for the Poke Bonnet.
  • Choosing Your hat Mold: For this project I found that a 4” - 5” diameter Terra Cotta flower pot gave me just the right size and shape for the hat I wanted to make and the surface of the pot provided a solid surface to work on.
Similarly sized and shaped plastic containers, like yogurt or sour cream containers, also work well. I also found that stacking the container for my hat mold on top of a slightly larger plastic container worked nicely to raise my hat mold up off my work surface, making it easier to work. DO NOT use metal containers for your hat mold as they are liable to create rust stains on your hat during the drying process.
]]>
https://larougetdelisle.com/blogs/sewing-with-cinnamon/hip-hip-beret-how-to-resize-a-hat-pattern-for-any-doll 2020-12-22T09:03:31-08:00 2023-09-02T18:11:12-07:00 Hip, Hip, Beret! How To Resize A Hat Pattern For Any Doll Cinnamon Miles Hi Everyone! In Part 4 we wrap up the topic with a look at resizing a hat pattern to fit any other size doll! Shari is joining us again with a detailed tutorial to demonstrate how it's done.

More

]]>
Hi Everyone! In Part 4 we wrap up the topic with a look at resizing a hat pattern to fit any other size doll! Shari is joining us again with a detailed tutorial to demonstrate how it's done.

As a reminder, all of the coupon codes, download links, and monthly bonuses can be found in the Sewing With Cinnamon Bonuses section.

Did you know you can easily customize the size of just about any fabric hat pattern to fit your favorite doll? Because there is only one key measurement,
the head circumference, it is as easy as 1, 2, 3... plug a few numbers into a simple math equation, reset the scale on your copy machine, and redraw the seam allowances. Seriously, it is as easy as that!

Special note: This works for a hat because there is only one measurement to consider. This same process does not work for clothing patterns because there are generally two measurements to consider (height and width) so the scaling process takes a little more finesse to get just right!

Here's Shari to explain the process in detail:


Here's a breakdown of the full tutorial:

Step 2:
Reset the Scale to Print Your Pattern

  • To resize your hat pattern (from 18" to 14.5"), simply click to print your PDF, choose the pages with your pattern pieces, and then adjust the custom scale to 77.08%.... or whatever percentage you came up with for your project. 


Step 3:
Redraw your Seam Allowances

  • The seam allowances will be rescaled in the printing process, so they will need to be adjusted to the correct width.
  • Using the stitching line as a guide, measure out ¼” to mark the new cutting line.
  • You can either use a ruler and a pencil to draw the new cutting lines OR you can take the thread off your sewing machine and use your seam guide to stitch the new cutting lines.


There you go, that's it! Your resized pattern is ready to sew.

    ]]>
    https://larougetdelisle.com/blogs/sewing-with-cinnamon/hip-hip-beret-the-banded-beret-pattern-hack 2020-12-15T08:00:17-08:00 2023-09-02T18:11:13-07:00 Hip, Hip, Beret! The Banded Beret Pattern Hack Cinnamon Miles Hi Everyone! In Part 3 we take our beret hats to a new level by adding a fun design element and a few embellishments. Shari is joining us again with a detailed pattern hack tutorial to demonstrate the ideas.

    More

    ]]>
    Hi Everyone! In Part 3 we take our beret hats to a new level by adding a fun design element and a few embellishments. Shari is joining us again with a detailed pattern hack tutorial to demonstrate the ideas.

    As a reminder, all of the coupon codes, download links, and monthly bonuses can be found in the Sewing With Cinnamon Bonuses section.

    In this tutorial, Shari is going to show you how to add a hat band to change
    the look of a basic beret. The concept is very similar to adding the hat band in the tailored beret, except the band is turned to the outside. Make the band with a sturdy woven fabric for a formal look or a knit fabric for a more casual appearance. Jazz up your banded beret by using contrasting fabric or adding a variety of embellishments. This is a simple pattern hack with endless
    possibilities.

    She'll be demonstrating this pattern hack on the hat from the Keepers Dolly Duds Coat Essentials pattern, but this techniques can also be done on the LJ Newsboy Cap & Beret too!

    Follow along to watch the process of adding the hat band:


    Here's a breakdown of the full tutorial:

    1. To determine the length of your hat band piece, measure your dolls
      head, letting the tape measure hug the head lightly where you want
      the edge of the beret to rest. Add 1/2” for the seam allowance.
      My dolls head is 12-1/4” in circumference, adding the seam
      allowance the length of my hat band piece should be 12-3/4”


    2. To determine the width of your hat band piece, decide how wide you'd
      like your finished hat band to be. Double that width and add 1/2” for the seam allowance. In my woven example, I would like to my finished hat band to be 3/4” wide, so the width of my hat band piece should be 2”.


    3. Using these measurements, cut out a hat band from the beret fabric OR a contrasting fabric. (Measurements for the hat bands used in my
      demonstration are 12-3/4” x 2” for the woven band OR 12-3/4” x 3” for the knit band.)


    4. Cut the outer beret pieces from your beret fabric and then cut the same
      pieces from your beret lining fabric. In this example, I am using the beret pieces from the “Coat Essentials” pattern, by Keepers Dolly Duds.


    5. With the right sides out, fold your hat band in half along the length. Press to crease. Skip this step if you are using knit fabric.


    6. Open the hat band back up and pin the ends right sides together. Stitch. Finger press the seam allowances open.


    7. Fold the hat band along the crease. Press the woven hat band again. Do not press the knit hat band.


    8. Fold the hat band in half at the seamline and pin each end to mark the center front and back.


    9. Fold the band in half again, this time matching the pins in the center. Pin each end to mark the center of each side. Set the hat band aside.


    10. Follow the pattern instructions for sewing the beret. Do not sew any of the lining pieces to the beret at this time. Now, sew up a beret lining exactly the same way as the beret.


    11. Mark the center front, center back, and centers of each side of the beret as you did the hat band. Repeat for the lining


    12. Compare the size of the bottom edge of the beret with the hat band. If the bottom edge of the beret is the same or slightly smaller than the
      hat band, stay-stitch the bottom edge of the beret and clip the curve. If the bottom edge of the beret is larger than the hat band, sew with two rows of gathering stitches. Repeat for the beret lining.


    13. Pin the hat band to the bottom edge of the beret right sides together
      aligning the markings and easing the fit. Stitch.


    14. Pin the beret and beret lining RIGHT sides together and matching the
      seamlines along the bottom edge. Stitch, leaving a 2” section open for turning.


    15. Turn the beret right out, tucking the lining inside the beret. Turn the seam allowance on the open section under and whipstitch to secure.
      Carefully press along the seamline to set the seam.


    16. Follow the same instructions for the knit band.


    17. There are lots of ways you can customize your beret. Use contrasting fabrics to add interest. Add embellishments such as bows or decorative
      flowers to the band or crown. Or, make your beret reversible by
      using an alternate hat fabric instead of the lining.


    The Finishing Touches: Add Some Personailty WIth These Fun Embellishments!


    Beret With A Knit Hat Band

    Create a cozy winter beret by making the hat band with a knit jersey, fleece, or soft minky. In my example, I used a soft minky and cut the band wider (2-1/2”) so it would cover my dolls ears. To make this hat, follow the instructions
    in the video, only DO NOT press fleece or minky type fabrics.


    Hat Toppers

    In the Tailored Beret tutorial, we added a classic stem to the top of our beret, but there are many other ways you top your beret to give it a custom look. A simple vintage or fabric covered button gives your beret a subtle finishing touch, decorative tassel adds a bit of panache, and and a pompom adds a little playfulness.


    Make a Fleece or Fur Pompom

    1. Cut a 2 inch circle of fleece, minky, or fake fur and sew a running stitch around the outer edge.
    2. Tuck a small amount of stuffing inside the circle as you draw up the running stitches to form a ball. Tack the stitching to secure.


    Whipstitch the pompom to the center of the beret to add it to the hat.


    Trimmings

    Before sewing up the hat band, add a length of ribbon, lace, or decorative trim to the outside half. After you sew up the beret, add a bow made with matching ribbon or lace.

    Fabric Bows and Flowers

    When you can't find that perfect trim to finish off your beret, use the leftover
    fabric that is right in front of you. Bows and flowers can easily be fashioned from scrap pieces of the fabric.


    How To Make A Simple Fabric Bow

    • For a 4” wide bow, cut a 4-1/2” wide by 4” long rectangle or oval from fabric (adjust the length or width as desired). Cut the bow on the grain for a crisp looking bow OR cut it on the bias for a bow with a little drape.


    • With the right sides together, fold the bow in half along the length. Stitch, leaving a small opening in the center for turning. Clip the corners. Turn right side out. Press, following the seamline. 


    • Cut another rectangle of cloth for the bow center 1-1/2” wide and 2” long. Fold the bow center in thirds along the length and press to crease.


    • Fold or gather the bow in the middle. Wrap with the bow center. Whip stitch the end to secure.
    • Attach the bow where desired along the band of the beret.


    A Simple Fabric Flower

    There are lots of ways to make fabric flowers. Here is a simple one for you to try.


    • Cut an assortment of 1-1/2” circles from a lightweight fabric (adjust the size as desired) for the petals.

    • Fold each petal in half along the bias. Pin the curved ends together, overlapping about 1/2”. Because of the curved edge, the line of petals will form a spiral. Use as many petals as you would like, between 3 and 5 works well for this scale. Once you have the desired number of petals, pin the ends together to form as circle.

    • Sew a running stitch 1/8” from the outer edge. Draw up the thread to form the flower and use the thread to take a few stitches to secure.

    • Arrange the petals as desired and stitch onto the hat. Sew a decorative button, or seed beads to the center to finish.
      ]]>
      https://larougetdelisle.com/blogs/sewing-with-cinnamon/hip-hip-beret-the-tailored-beret-pattern-hack 2020-12-08T08:25:33-08:00 2023-09-02T18:11:13-07:00 Hip, Hip, Beret! The Tailored Beret Pattern Hack Cinnamon Miles Hi Everyone! In Part 2 we explore structure and tailoring with a look at adding that extra special touch to your Miniature Millinery project! Shari is joining us again with a detailed pattern hack tutorial to demonstrate the idea.

      More

      ]]>
      Hi Everyone! In Part 2 we explore structure and tailoring with a look at adding that extra special touch to your Miniature Millinery project! Shari is joining us again with a detailed pattern hack tutorial to demonstrate the idea.

      As a reminder, all of the coupon codes, download links, and monthly bonuses can be found in the Sewing With Cinnamon Bonuses section.

      In this tutorial, Shari is going to show you how to tailor your favorite basic beret pattern by adding a full lining and a hat band. It doesn't change the overall look of the beret, but it helps the beret to sit more solidly on your dolls head and gives it a more professional finish. She'll be demonstrating this pattern hack on the hat from the Keepers Dolly Duds Coat Essentials pattern, but this techniques can also be done on the LJ Newsboy Cap & Beret (you can see the additional instructions for that one in the post below the video).

      Follow along to watch the process:


      Here's a breakdown of the full tutorial:

      • The first thing I need to do is determine the width and length of the hat band piece. Because the hat band will be folded in half, the width should be double the desired width of the hat band plus 1/2”for the seam allowance. The length of the hat band should be the circumference of the doll's head plus 1/2” for the seam allowance.
      • I want the finished hat band to be ½” wide and my doll has a 12- 1/4” head circumference, so my hat band piece should measure 1-1/2” wide and 12-3/4” long.
      • Using these measurements, cut out a hat band from a lightweight piece of muslin or other sturdy fabric. Cut the outer beret pieces from your beret fabric and then cut the same pieces from your beret lining fabric.
      1. With the right sides out, fold your hat band in half along the length. Press
        to crease.
      2. Open the hat band back up and pin the ends right sides together. Stitch.
        Finger press the seam allowances open.
      3. Fold the hat band along the crease and finger press again. Edge stitch close to the folded edge.

      4. Fold the hat band in half with the seamline at one end. Pin each end to mark the center front and center back. Fold the band in half again, this time matching aligning the pins. Pin each end to mark the center of each side. Set the hat band aside. and center back. Fold the band in half again, this time matching aligning the pins. Pin each end to mark the center of each side. Set the hat band aside.

      5. Follow the pattern instructions for sewing the beret. Do not sew any of the lining pieces to the beret at this time. If desired, finger press each seam allowance open and edge stitch on both sides of the seamline. This gives the beret a more finished look. Now, sew up a beret lining exactly the same way as the beret.

      6. Pin the beret and beret lining WRONG sides together, matching the seamlines along the bottom edge. 
      7. Compare the size of the bottom edge of the beret with the hat band. If the bottom edge of the beret is the same or slightly smaller than the hat band, stay-stitch the bottom edge of the beret and beret lining together and clip the curve. If the bottom edge of the beret is larger than the hat band, secure the beret and beret lining together with two rows of gathering stitches. In my example, the bottom edge of the beret is about the same size as the hat band so I will stay-stitch and clip the bottom edge of the beret. 

      8. Mark the center front, center back, and centers of each side of the beret as you did the hat band.

      9. With the right sides together and matching the markings, pin the hat band to the bottom edge of the beret. Ease the fit of the beret by
        stretching the clipped edges or evenly drawing up the gathering stitches. Stitch.

      10. Press the seam allowance toward the hat band. Understitch the seam allowance to the hat band to help the band roll neatly inside the beret.

      11. Turn the hat band under and finger press, following the seamline.

      That's it! Look how nicely your beret sits on your dolls head.


      To add the tailored hat band to the inside of the Newsboy Cap or Beret pattern you will need to gather it a bit to fit the band. Follow along to see how:

      If your beret head diameter is larger than your hat band, sew two rows of gather stitches around the edge instead of the stay-stitching.

      With the right sides together, pin the hat band to the bottom edge of the beret. Draw up the gathering stitches evenly to ease the fit around the hat band. Stitch the band in place.

      Press the seam allowance toward the hat band, then under stitch the seam allowance to the hat band.

      Turn the hat band under along the seamline, finger press to set in place.

      That's it! Now you have a Tailored Beret that fits snugly on the dolls head!


      The Finishing Touch: Add That Quintessential Stem To The Top!

      As a finishing touch to this tailored beret, I am going to add the quintessential stem on top. For this, you will need a 3/4” x 4” piece of beret fabric cut on the bias.

      1. Fold the stem piece in half along the length with the right sides together.
        Depending on how thick you would like the stem, stitch 1/8” to 3/16” from the folded edge.

      2. Trim the seam allowance to 1/8”. To turn the stem right side out, snip the
        folded edge up to the seamline about 1/2” from one end. Slip a bobby pin onto the cut end, slide it inside the stem, and push the bobby pin through. Once you work the end of the stem inside, the rest to the stem should slide through easily.

      3. Trim each end of stem, cutting the stem to the desired length. Use the
        back of the bobby pin to tuck the ends under. Whip stitch the top end of the stem to secure.
      4. Fold the top of the beret in half twice to find the center and mark with a
        fabric pen or pin.
      5. Whip stitch the stem to the center of the beret top, being careful to
        keep the stitches small and hidden.

        ]]>
        https://larougetdelisle.com/blogs/sewing-with-cinnamon/hip-hip-beret-topic-overview-and-sew-along 2020-12-01T09:01:14-08:00 2023-09-02T18:11:14-07:00 Hip, Hip Beret! Topic Overview and Sew-Along Cinnamon Miles Hi Everyone! Are you ready for another Miniature Millinery topic? This month, Shari Fuller is joining us again to share her knowledge and expertise as we jump back into the the world of teeny tiny hat making!

        More

        ]]>
        Hi Everyone! Are you ready for another Miniature Millinery topic? This month, Shari Fuller is joining us again to share her knowledge and expertise as we jump back into the the world of teeny tiny hat making!

        As a reminder, all of the coupon codes, download links, and monthly bonuses can be found in the Sewing With Cinnamon Bonuses section.

        Here's a bit on this exciting topic from Shari:

        From their humble beginnings as simple shepherds caps throughout Ancient Europe, berets quickly became a common and practical form of head wear among peasants. This smart little cap eventually attracted the attention of soldiers, artists, and aristocrats alike, transforming the common beret into a symbol of strength and style. Shepherds made the first berets by felting and shaping the wool that was readily available to them. Today, berets are fashioned from a wide range of materials in a variety of styles.

        This month, we will look at ways you can make your own variations of this wonderful little cap. The topic will be divided into a 4-part series:

        • In part one, we will do a sew along of Liberty Jane's 6 paneled Newsboy Cap and Beret pattern.
        • In part two, we will show you how to tailor your favorite beret pattern to get a professional fit and finish.
        • In part three, we will show you how to add a hat band and a few embellishments to a basic beret pattern to give it a whole new look.
        • In part four, we are going to show you how you can easily resize ANY sewn hat pattern to customize the fit for your favorite doll... or person.The Newsboy Cap & Beret Hat Sew-Along


        The Newsboy Cap & Beret Hat Sew Along

        Ok, now let's jump into the sew-along! Follow along as I show you how to sew both the Newsboy Cap and the Beret Hat for 18" dolls. This pattern has just been updated and the download links were sent out last night to anyone who already purchased this pattern in the past. If you don't have it yet, then this is the pattern we recommend you use this months coupon code for!

        This hat is super easy to sew and can be made from a variety of fabrics. I'm using a sweater knit for the Newsboy variation and a sparkly sequined fabric for the beret. For both variations, I'm using a poly-blend lining and have applied some Fray Check® to the edges to keep things sized properly (tip from last months topic!).


        That wasn't too bas, was it? This is such a fun and easy project to make! It's a great accessory for a variety of outfits and styles! I hope you'll jump in an sew up a hat or two!


        ]]>
        https://larougetdelisle.com/blogs/sewing-with-cinnamon/miniature-millinery-the-breton-hat-tutorial 2020-02-25T08:30:00-08:00 2023-09-02T18:12:15-07:00 Miniature Millinery - The Breton Hat Tutorial Cinnamon Miles Hi Everyone! Welcome to Part 4 of Miniature Millinery! This week we are going to make a simple Breton style hat. A Breton is a type of hat with a turned-up brim. Believe it or not, this is just a super easy variation of the Molded felt hat from week one. There is no ironing involved and even the sewing is optional.

        More

        ]]>

        Hi Everyone! Welcome to Part 4 of Miniature Millinery!

        This week we are going to make a simple Breton style hat. A Breton is a type of hat with a turned up brim. Believe it or not, this is just a super easy variation of the Molded felt hat from week one. There is no ironing involved and even the sewing is optional. 

        For this weeks project you will need:

        • 12-inch square of felt, wool or wool blend felts work the best
        • 4-inch Durafoam ball, the solid closed cell type... this is the same size we used the last three weeks
        • 4.5-inch Durafoam ball, the solid closed cell type
        • 4-inch diameter tin can, cut open with a smooth edge can opener so you don't cut yourself or snag your felt. An extra large can of mandarin oranges I found at the grocery store was just the right size and made a great snack while I was waiting for my felt to dry
        • Six 1/4-inch wide rubber bands, that fit snugly around the foam ball
        • Serrated knife
        • Buttonhole thread for cutting the foam ball
        • Four pins, preferably T-pins, to hold the hat on the hat block
        • Cornstarch or choice of Fabric Starch
        • Soap

        If you want to apply trim to the brim of your hat you will also need: 

        • 16-inch square of lightweight fabric for bias trim OR
        • Thread 
        • Sewing Machine


           Week Four Task:
          • Start your project by cutting your foam balls and preparing you hat stiffener as you did in week one, Then, stretch your felt using a 4.5 inch hat block instead of a 4 inch hat block.
          • Once the hat is stretched over the hat block, there is no need to flatten the brim. In fact we get to skip ironing altogether and go right to dipping the hat in the stiffener.
          • Carefully squeeze out any excess stiffener and lay the hat out on a towel to dry. That's it. Just walk away until the hat has completely dried. 
          • Trimming the hat is optional. If you would prefer to leave the bottom edge of your hat raw, you can skip on to shaping your hat.
          • Jump over the SWC Facebook Group for conversation and project sharing. Be sure to tag Shari there so she gets notified and can respond quickly!


          ]]>
          https://larougetdelisle.com/blogs/sewing-with-cinnamon/miniature-millinery-the-1940s-pleated-felt-hat 2020-02-18T08:00:00-08:00 2023-09-02T18:12:16-07:00 Miniature Millinery - The 1940's Pleated Felt Hat Cinnamon Miles Hi Everyone! Welcome to Part 3 of Miniature Millinery! This week we are introducing a new pattern, the 1940's Pleated Felt Hat, and have a full tutorial video to go along with it! The pattern is available to be redeemed with your February discount code, or you can simply choose to purchase it!

          More

          ]]>

          Hi Everyone! Welcome to Part 3 of Miniature Millinery! This week we are introducing a new pattern, the 1940's Pleated Felt Hat, and have a full tutorial video to go along with it! The pattern is available to be redeemed with your February discount code, or you can simply choose to purchase it!

          For this weeks project, you will need to make the same basic felt hat that we made in week one, except don't cut out the brim, this new design includes a new pattern piece to create this stunning pleated shaped hat!

          Supplies needed for this project, beyond the first set of basic supplies:

          • 13 inches of 1/2-inch wide ribbon for the hat band,
          • a 12 inch square of lightweight fabric for the lining.... synthetic lining, batiste, voile, or silk work well for this.
          • A tapestry or leather needle
          • Buttonhole thread 
          • Some small feathers or other similar embellishments if you'd like to jazz up your hat a bit.


           Week Two Task:

          • If needed refer back to the video for Part 1, and follow along to make the basic molded felt hat first, but don't cut the brim! Then follow along with this new design to create a darling 1940's inspired hat!
          • Jump over the SWC Facebook Group for conversation and project sharing. Be sure to tag Shari there so she gets notified and can respond quickly!

          Miniature Millinery - Molded Felt Hats Part Two:


          We encourage you to watch the video (or download it from the link above to watch offline).  


          ]]>
          https://larougetdelisle.com/blogs/sewing-with-cinnamon/miniature-millinery-molding-the-tricorn-hat 2020-02-11T08:00:00-08:00 2023-09-02T18:12:18-07:00 Miniature Millinery - Molding the Tricorn Hat Cinnamon Miles Hi Everyone! Welcome to Part 2 of Miniature Millinery! This week we go a step further and mold the basic hat into a Molded Tricorn Hat. It's fun to see how adding just a few new design elements creates a totally different look!

          More

          ]]>

          Hi Everyone! Welcome to Part 2 of Miniature Millinery! This week we go a step further and mold the basic hat into a Molded Tricorn Hat. It's fun to see how adding just a few new design elements creates a totally different look!

          Now that you have your basic felt hat, you have endless options for finishing it! In this example, we're going to make a simply trimmed tricorn hat to walk you through the basics of finishing and shaping a felted hat. Once you've mastered that, you can embellish these hats to your heart's content!


           Week Two Task:

          • If you haven't completed the project in Part 1, you'll want to jump back over to that post and follow along to make the basic molded felt hat first. To do that, You'll need to click over the Sewing With Cinnamon Bonuses section, and download pattern piece pages for the brim of the cockade/tricorn hat. Review the supply list below and gather up all the necessary fabrics and supplies. Then watch the video and follow along to see how it's all done!
          • Now you can follow along to create the molded tricorn hat variation! Be sure to look over the supply list for this project. Gather up all the things you'll need and follow along as Shari walks you through making the Molded Tricorn Hat!
          • Jump over the SWC Facebook Group for conversation and project sharing. Be sure to tag Shari there so she gets notified and can respond quickly!

          Miniature Millinery - Molded Felt Hats Part Two:


          We encourage you to watch the video (or download it from the link above to watch offline). But we know that the written instructions can also be preferred. Follow along below for the breakdown of the entire process:

          Supplies Needed:

          • 1/2 yard (0.5m) fabric for lining and trim 
          • 14-inches 1/2-inch wide ribbon for the hat band 
          • 6-inches ( 25 cm) 1/8-inch (3 mm) wide ribbon for cockade band 
          • One 3/8-inch (9 mm) decorative button 
          • 6-inches ( 25 cm) 2-inch wide satin ribbon for a cockade 
          • Perle cotton, narrow ribbon, or embroidery floss for tacking the hat brims 
          • Thread 
          • Tapestry or Leather needle 

           (Continuing from part 1)

          Step 11: If the hat will feature a cockade band, fold the 1/8-inch (3 mm) wide ribbon for the cockade band in half to form a loop, being careful not to twist the ribbon. Pin the ends of the ribbon side by side on the top edge of the brim where indicated on the pattern piece. Baste to secure. 

          Bias Trim

          Step 12: Cut the bias trim to the proper length. Being careful not to twist the bias trim, pin the ends right sides together. Stitch and press the seam allowance open.


          Note: To distinguish the topside from the underside of the hat, the underside is left unshaded in the illustrations. 

          Step 13: Pin one edge of the bias trim along the outer edge of the brim with the right side of the bias trim facing the underside of the brim. Stitch with a 1/2-inch (12 mm) seam allowance. 

          Step 14: Turn the bias trim over the edge of the brim, pulling gently so that the bias trim lays at along the seamline underneath. Turn the raw edge under so that the folded edge lines up the with seamline on the upper side of the brim and pin in place. Hand stitch or machine stitch to secure. Press the brim using plenty of steam to set the seams and tighten up the trim around the edge of the brim. 

          Step 15: Make a hat band by cutting a length of 1/2-inch (12 mm) wide ribbon about 1-inch ( 5 cm) longer than the circumference of the crown of the hat along the brim. Stitch the ends together using a 1/2- inch (12 mm) seam allowance. Press the seam allowance to one side. Place the hatband around the crown of the hat so that the seam is at the side or the back. Tack the hat band to the crown at the seam allowance. 

          Step 16: Bring the cockade band to the underside of the brim and mark the inside bottom of the loop. Stitch a decorative button at the mark and fasten the band over it.


          Step 17: Press and steam the hat brim to so en the felt. Once it feels pliable, turn up the brim along the fold lines where indicated on the pattern. You don’t want to crease the brim, only curl it along the fold lines. If necessary, spray the brim with a little bit of water to make it easier to manipulate the felt. Use your finger to smooth and curve the folds. The felt will stiffen up again as it dries. Pin the brim to the crown of the hat at the dots, adjusting the position so that the tacking points are evenly spaced on either side of the centerline. Use your fingers to smooth and shape the brim as desired, spraying with a little water as necessary to work out any creases. Use water only as necessary to avoid distorting the shape of the rest of the brim. Once you are happy with the shape, let the hat completely dry. 

          Step 18: A er the hat has dried, use a leather or tapestry needle to tack the brim in place at the tacking points with a perle cotton, embroidery floss, ribbon, or string. 

          Lining The Hat 

          Step 19: Pin two sets of lining pieces right sides together and matching the notches. Stitch. Clip the curves and press the seam allowances open. 

          Step 20: Pin the two lining sections right sides together, matching the notches and seam lines. Stitch. Clip the curves and press the seam allowances open. Stay-stitch the lining 1/4-inch (6 mm) om the bottom edge. 

          Step 21: Turn the bottom edge of the lining under along the stay-stitching and pin it inside the hat along the bottom edge of the crown. Being careful not to crush the hat while you work, whipstitch the lining to the crown to secure. 

          Step 22: Pin the ends of the cockade ribbon right sides together. Stitch. Press the seam allowances open and turn right side out. 


          Step 23: Sew two rows of running stitches down the center of the cockade ribbon. Draw the running stitches up to gather the cockade into a bow. Tack the ends of the thread securely at the back of the cockade. 

          Step 24: Place cockade in cockade holder, tack in place to secure, if necessary.


          ]]>
          https://larougetdelisle.com/blogs/sewing-with-cinnamon/miniature-millinery-making-molded-felt-hats 2020-02-04T08:00:00-08:00 2023-09-02T18:12:26-07:00 Miniature Millinery - Making Molded Felt Hats Cinnamon Miles Hi Everyone! Welcome to Miniature Millinery! I'm excited to announce that Shari Fuller, the designer of the Thimbles and Acorns brand, will be my co-host once again, follow along as she shares with us her knowledge and experience of this topic!

          More

          ]]>

          Hi Everyone! Welcome to Miniature Millinery! I'm excited to announce that Shari Fuller, the designer of the Thimbles and Acorns brand, will be my co-host once again, follow along as she shares with us her knowledge and experience of this topic!

          Nothing makes a statement quite like a stunning hat! This month, we are really excited to make a statement with all of you as we begin exploring the topic of Miniature Millinery. In this first series, we are going to learn some basic techniques for making felt hats using The Thimbles and Acorns 18th century Molded Felt Hat pattern.

          The topic will be divided into four parts:

          • This first week, in part one, we will make a round hat block that we will use to mold felt fabric into a simple wide-brimmed hat.
          • In part two, we'll take the process a step further as we learn how to trim and shape our plain wide-brimmed hat into a classic 18th century tricorn.
          • In part three, we are going to see how cutting and folding can turn a basic hat into a spectacular 1940s art deco hat.
          • Finally, in part four, we'll turn things upside down when we create a fun and modern Breton style hat.

          It's going to be a fun course! Are you ready? Let's go...


          Week One Task:

          • You'll need to click over the Sewing With Cinnamon Bonuses section, and download pattern piece pages for the brim of the cockade/tricorn hat. Review the supply list below and gather up all the necessary fabrics and supplies. Then watch the video and follow along to see how it's all done!.
          • Jump over the SWC Facebook Group for conversation and project sharing. Be sure to tag Shari there so she gets notified and can respond quickly!

          Miniature Millinery - Molded Felt Hats Part One:


          We encourage you to watch the video (or download it from the link above to watch offline). But we know that the written instructions can also be preferred. Follow along below for the breakdown of the entire process:

          Supplies Needed:

          • 4-inch styrofoam ball, the closed cell type
          • 6 1/4-inch wide rubber bands, that fit snugly around the styrofoam ball
          • Serrated knife
          • Buttonhole thread for cutting the styrofoam ball
          • Four pins, preferably T-pins to hold the hat on the styrofoam hat block
          • Cornstarch or choice of Fabric Starch
          • Soap
          • Old towel for pressing the hat (towel should have minimal texture and may get stained)
          • 12-inch square of felt

          Suggested Fabrics:

          • Wool or wool blend felt 
          • Synthetic felt will work, but won’t look as nice
          • Lightweight lining fabric, batiste, muslin, lawn, voile, or silk for hat lining


          Preparing the hat block:

          For this project, cut a 4-inch styrofoam ball in half to make the two hat blocks. The easiest way to cut these balls is to cut a shallow ridge with a serrated knife around the hemisphere of the ball. Have one person hold the ball firmly while another person draws a length of buttonhole thread around the back of the ball through the ridge in a sawing motion. The thread will slice neatly through the ball. Scrape any excess foam om the center bottom so that the hat block lays at. That’s it, your hat block is ready to use!

          Preparing the starch solution:

          Step 1: Feel free to use one of the many fabric stiffening products available in stores for this project. However, a simple solution of corn starch and water works quite well, costs practically nothing, and creates very little waste. 

          2 cups cold water
          1 Tablespoon corn starch 

          Corn Starch Hat Stiffener 

          Mix the corn starch and water together in a small saucepan until the corn starch is completely dissolved. Using medium heat and stirring constantly, bring the mixture to a boil. Alternately, mix the water and cornstarch together in a microwave-safe bowl. Microwave on high, stirring every minute or so to help prevent lumps, until the mixture comes to a boil. Cover and set aside to cool while you prepare your hat.

          Molding the Hat: 

          Step 2: Fill a clean sink or dishpan with hot soapy water. The water should be about the temperature of dishwater with a generous squirt of dish soap or whatever type of soap you prefer. Soap isn’t really necessary for this project since we are using material that has already been felted, however, it does make it easier to manipulate the fabric. 

          Step 3: Dip the felt into the soapy water, soaking it thoroughly. Wrap the wet felt around the hat block, centering it at the top and secure it around the bottom edge of the hat block with a rubber band. 

          Step 4: Pull the edges of the felt, stretching it around the hat block to smooth out the puckers. Continue to smooth and stretch the felt until all the puckers are worked out on the hat block. Adjust the placement of the rubberband and dip the felt back in the hot soapy water as necessary. 

          Step 5: Once the felt is smooth on the hat block, rinse it thoroughly in the cold water. 

          Step 6: Leave the molded hat on the hat block and lay it on a layer of old towels. Use smooth towels as any texture om them will transfer to the hat brim during the flattening process. Spread the edges of the felt out around the hat block to form a brim and adjust the rubber band so that it lays evenly along the bottom edge. Push hat pins into the hat block just above the rubber band to hold the felt and rubberband in place. 

          Step 7: Use your fingers on one hand to hold the hat along the rubber band and gently pull the edges of the felt with your other hand to stretch and flatten the brim. Working from the outer edge, press the brim at with a hot dry iron. The heat and steam om the wet felt will help to draw the fibers together to reshape and smooth the felt. Continue working around the outside of the brim, moving toward the hat block as the fabric smooths and flattens. Once you get to the hat block, work the edge of the iron up to the rubber band to form a sharp crease between the crown and the brim of the hat. 

          Step 8: Once the hat brim has been flattened and smoothed, dip the hat and hat block in the stiffener, completely saturating the felt. Carefully squeeze out any excess stiffener and lay the hat back on the towel, smoothing the brim out with your fingers. If there are any lumps in your stiffener, remove them om the fabric or rub them into the fabric until they disappear. Let the hat air dry. If preferred, you can use a purchased stiffening product for this step. Follow the manufacturer’s instructions. 

          Step 9: Once the hat is dry, smooth and flatten the brim with a hot iron and plenty of steam. If necessary, spray the brim with water to increase the steam. Take special care to run the edge of the iron around the edge of the hat block to get a sharp crease between the crown and the brim. 

          Cutting the Hat Brim 

          Step 10: Pin the hat brim template to the hat and cut the brim accordingly. Transfer the cockade placement markings to the upper side of the brim and the tacking point markings to the underside of the brim. Carefully remove the hat from the hat block.  

          Step 11: If the hat will feature a cockade band, fold the 1/8-inch (3 mm) wide ribbon for the cockade band in half to form a loop, being careful not to twist the ribbon. Pin the ends of the ribbon side by side on the top edge of the brim where indicated on the pattern piece. Baste to secure. 

          Bias Trim

          Step 12: Cut the bias trim to the proper length. Being careful not to twist the bias trim, pin the ends right sides together. Stitch and press the seam allowance open.


          Note: To distinguish the topside from the underside of the hat, the underside is left unshaded in the illustrations. 

          Step 13: Pin one edge of the bias trim along the outer edge of the brim with the right side of the bias trim facing the underside of the brim. Stitch with a 1/2-inch (12 mm) seam allowance. 

          Step 14: Turn the bias trim over the edge of the brim, pulling gently so that the bias trim lays at along the seamline underneath. Turn the raw edge under so that the folded edge lines up the with seamline on the upper side of the brim and pin in place. Hand stitch or machine stitch to secure. Press the brim using plenty of steam to set the seams and tighten up the trim around the edge of the brim. 


          ]]>