 Hi Everyone! In Part 4 we wrap things up with a fun look at a classic 80s style accessory - the bandana! Shari has put together a tutorial showing how to use a purchased bandan to create 4 unique doll-size mini bandanas while utilizing the classic print. She also created a super cute style guide showcasing all the creative ways to waer those mini bandanas - 80s style!]]>
Hi Everyone! In Part 4 we wrap things up with a fun look at a classic 80s style accessory - the bandana! Shari has put together a tutorial showing how to use a purchased bandan to create 4 unique doll-size mini bandanas while utilizing the classic print. She also created a super cute style guide showcasing all the creative ways to waer those mini bandanas - 80s style!
Are you ready? Grab your fabric or purchased 21" bandana and follow along in the tutorial posted below!
Part 4 Tutorial and Style Guide- 80s Bandanarama!
How To Make a Doll-Sized Bandana
Cutting Instructions:
18” dolls are about 1/3 the scale of a real person, so in most instances scaling down full-size objects to 1/3 (.33) the size works in most applicational. A typical bandana measures about 21” square and with simple math we can scale it down for an 18” doll simply by multiplying the .33 scale of the doll by the full-size measurement of 21”.
.33 x 21” = 7” (rounded to the nearest 1/4”)
Add .5” for the hem allowance and the cutting size for your doll-size bandana is: 7.5” square.
But Wait! Because dolls heads are proportionately larger than their bodies, the 7.5” square will only work for bandanas worn on the dolls body. 18” doll heads are closer to about 3/5 the scale of a real person, so a bandana that will be worn on a dolls head should be scaled down 3/5 (.6).
.6 x 21” = 12.5” (rounded to the nearest 1/4”)
Add .5” for the hem allowance and the cutting size for your doll-size bandana to be worn on the head is: 13” square
Using the pictured layout, you should be able to cut a 13” bandana and half bandana and a 7.5” bandana and half bandana from a single full-size bandana.

Sewing Instructions:
The measurements for this bandana allow 1/4” for a narrow hem.
Standard Bandana - Working on one side at a time, turn each edge of the bandana under 1/8” twice and press to make a narrow double-fold hem. Carefully align the corners as you press to keep the raw edges concealed.

To prevent the fabric from getting jammed in the sole plate, place a piece of tissue paper under the corner of the bandana before you begin stitching. Stitch the hem your bandana, slipping another small piece of tissue paper under each corner as you sew to keep the corners from getting jammed in the sole plate of your of by machine
Note: If preferred, use a hemming foot to hem the edges of your bandana. This video is part of the Sewing Machine Presser Feet Master Class:
Half Bandana - For a less bulkiness, cut the bandana in half along the diagonal before hemming to form two triangles. Hem as with the standard bandana. This variation will work for most applications shown in this tutorial... with less bulk!

How to Wear a Bandana - 80s Style
Let's Start at the Top! For most of these styles, use the larger 13" head-size bandana.
The Hair Tie - When it came to hair ties, there were scrunchies and their were bandanas worn over a basic elastic band. We always went BIG in the 80s, and a simple elastic band would never do!
- Tie up your dolls hair with an elastic band. Use the small size 7.5" bandana for this style. Roll your bandana from corner to corner along the diagonal (or from the diagonal to the opposite corner if using the half bandana). Wrap the rolled bandana around the elastic band and secure with a knot or a bow.

Pop Artist – Nothing says 80s like big bangs accentuated with an even bigger hair accessory.
Roll your bandana from corner to corner along the diagonal (or from the diagonal to the opposite corner if using the Half Bandana). Wrap the bandana around the back of your dolls head and tie it on top in a bow or a knot. For a funkier look, twist the ends until they curl up on themselves and tuck under the knot. Wear more than one for a totally 80s layered look.

For a Rosie the Riveter look, fold the bandana in thirds on the diagonal.

Wrap the bandana around the back of your dolls head, wrapping up the hair in back and tying it on top in a bow or a knot.

The Headband – A favorite school girl hair accessory.
Fold your bandana in half along the diagonal or start with a Half Bandana. Fold in narrow folds (about 1/2”) from the corner to the diagonal edge. Wrap the bandana around your dolls head and secure with a knot to get a proper fit. Slide the bandana off around your dolls neck. Arrange your dolls hair and slide the bandana back over your dolls head with the knot at the back of the neck under the hair. If your doll has bangs, complete the 80s look by teasing them up as high as possible! For a bit more interest, tie a knot slightly off-center on the folded bandana before putting it on.

The Rockstar – Iconic and cool!
Fold your bandana in half on the diagonal or start with a Half Bandana. Fold it from the corner to the diagonal edge in 1” folds. Wrap the bandana around your dolls forehead, over the hair and tie at the back of the neck.

The Workout – As the physical fitness craze took off, sweatbands became a fashion accessory.
Fold your bandana in half along the diagonal or start with a Half Bandana. Roll the bandana tightly from the corner to the diagonal edge. Hold the ends of the bandana and give it a couple of twists. For a bit of glitz, wrap a piece of narrow metallic trim down the length of the bandana. Wrap the bandana around your dolls forehead and tie at the back of the head.

The Bad Hair Day (two ways) - Some days, that big hairstyle didn't work out. On those days, we would done our favorite comfy jeans and t-shirt and simply wrap our hair up 1940s style.
Fold your bandana in half along the diagonal or start with a half bandana. Place the folded edge of the bandana on the top of your dolls forehead. Bring the corner down over your dolls head and tie the ends over the corner at the base of the neck to hold it in place. Leave the corner free or tuck it under.

Or go for a Retro Style! For a little variation, turn this look upside down, tying the ends of the bandana at the forehead and tucking the corner under the knot.

The Biker - Just like The Bad Hair Day, except way cooler!
Fold a corner down on the diagonal, not quite in half. Place the folded edge of the bandana onto your dolls forehead near the eyebrows.

Bring the corner down over your dolls head and tie the ends over the corner at the base of the neck to hold it in place. Let the extended length of the corner hang down the back.

Neckwear! For these styles, use the smaller size 7.5" bandana.
The Bandit - This was the most common way to wear a bandana in the 80s. This handy accessory could rock even the plainest of tops.
Fold your bandana in half along the diagonal or start with a Half Bandana. Wrap the bandana loosely around the front of your neck and tie it in back. Wear it over a button down shirt with the collar turned up or on top of a basic tee. Wear more than one for a totally 80s layered look.

The Sailor – For a little nautical style.
Fold your bandana in half along the diagonal or start with a Half Bandana. Wrap the bandana around your doll’s neck and tie it loosely in the front with a square knot. For a little variation, roll the diagonal edge down to shorten the corner.

The French Tie – For the hipster in the 80s.
This works best with a Half Bandana. Fold your bandana with a narrow fold or roll it tightly from the corner to the folded edge. Wrap the bandana around your doll’s neck once. Tie the ends together in square knot. The knot can be worn in the front or off to the side. Turn it into a choker by moving the tie to the back of the neck.

From the Waist Down! The half-bandanas work best in the following applications.
The Bracelet - In the 80s, it was common to see bandanas wrapped around wrists like bracelets. Not only did they look cool, but this also kept your bandana handy in case you suddenly needed a headband to tie your hair back during art class.
Use the smaller size bandana for this application. Fold in narrow folds from the corner to the diagonal edge. Wrap the bandana around your dolls wrist twice, tying the ends on top of the wrist. Tuck the ends under, if desired. Not only did we tie these to our wrists, but we also liked to wear them tied to our thighs over a pair of jeans or to our ankles. Wear more than one for a totally 80s layered look.

The Belt – 80s styles belts came in every size and shape imaginable. A bandana was an easy way to add shape and a splash of color to an 80s ensemble.
For dolls with a larger waistline, use a 13" head-size bandana. Fold your bandana with a narrow fold or roll it tightly from the corner to the diagonal edge. Wrap the bandana around your dolls waist over baggy tops or through the belt loops of your favorite jeans. Tie in the front or off to the side with a knot. Leave the ends loose for a more casual look or twist the ends until they curl up on themselves and tuck under the knot to give it a bit more style. Wear more than one for a totally 80s layered look. (not pictured)
Week Three Tasks:
- Follow along with this tutorial. Make your own bandana from any woven cotton fabric, or use a purchased bandana to create ones with the classic bandan print!
- Jump over the SWC Facebook Group for conversation and project sharing.
- - - - - - - - - - - - - - - - - - - - - - - - - - - - - - - - - - -
October Membership Links & Coupons:
Find the downloadable video collection on Vimeo, here:
https://larougetdelisle.com/user39282990/sewing-a-themed-wardrobe-1980s-style
Password: STYLE2010
Free Pattern Info: This code is good for one free pattern from larougetdelisle, any brand (€5.99 maximum discount, higher priced patterns will have a remaining balance due). This code expires 10-31-2010 and is a one-time use code available to Sewing With Cinnamon members exclusively.
Pattern Coupon Code: STYLE2010
- For this topic we recommend using the code to grab the Liberty Jane High-Waisted Jeans pattern (if you don't already have it). Then jump in and follow along in the pattern hack outlined below.
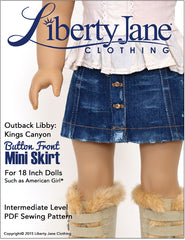
- Other patterns that will be used in this course over the following weeks are: The new Thimbles & Acorns Jelly Flats, Liberty Jane Bubble Skirt, and Liberty Jane Button Front Mini Skirt.
- Or check out the style guide info in Part 1 for other patterns with a 1980s theme!
Course PDF Download: Members are eligible to download one course in a PDF format each month (this also includes longterm access to download the videos). This member benefit used to be for just the most recent months topic, but now you can choose to use this on the most recent topics, found in the SWC Bonuses section (not available to the public yet) or any course listed on the main website in the Sewing With Cinnamon Courses collection.
Note - The current months topic will be available to download the first week of the following month and can be redeemed with next months coupon code.
Course Coupon Code: SWC2010
 Hi Everyone! In Part 3 we switch gears a bit and take a look at something a bit more crafty! Shari is joining us with a fun new pattern and members-only full video tutorial! Everyone who grew up in the 80s remembers those trendy bright plastic shoes we called jellies, Right? This week, Shari is going to show you how to make a doll size version of the totally awesome jellies with a handful of glitter hot glue sticks.
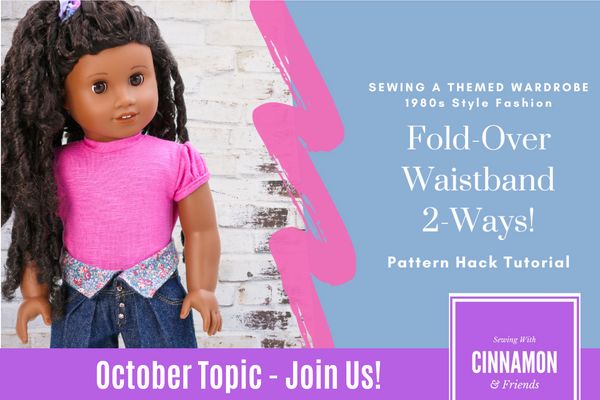 Hi Everyone! In Part 2 we jump right into another iconic design element of the 80s, the fold-over waistband! I don't know about you, but this was something I rember very fondly. I had an amazing pair of jeans that were accented with a mix & match color set, green, pink and yellow highlighting this fun design style! In this post, I'll walk you through two super simple ways to recreate this look. Once you see how to do it, you can use this same technique on any pattern that has a fitted waistband with a center front opening or seam, pretty fun right?
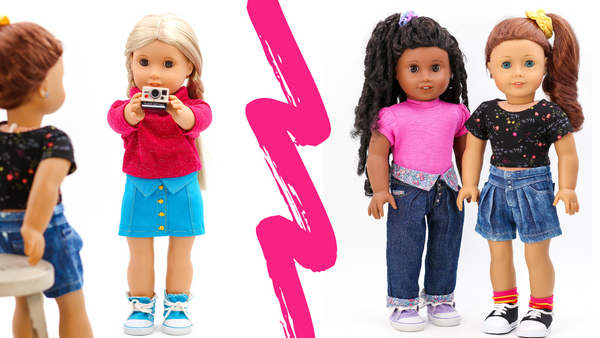


 Hi Everyone! Welcome to a new installment of Sewing A Themed Wardrobe, this time we're taking a trip down memory lane! The theme is "1980s Style Fashion". In this topic we will explore the style that stood out and really set the tone for that era. Items like acid washed denim, pleated jeans, bubble skirts, leggings, jelly flats, scrunchies, and of course, big hair! Wheather you're creating an expanded wardrobe for the new 1986 historical character, Courtney Moore™ or creating the pieces for the modern day, I'm sure we'll have fun creating these things together!


