https://larougetdelisle.com/blogs/sewing-with-cinnamon.atom larougetdelisle - Sewing With Cinnamon 2023-03-28T14:07:25-07:00 larougetdelisle https://larougetdelisle.com/blogs/sewing-with-cinnamon/sewing-with-zero-waste-got-scraps 2021-08-24T08:36:56-07:00 2023-09-02T18:10:17-07:00 Sewing With Zero-Waste: Got Scraps? Cinnamon Miles Hi Everyone! In Part 4, we wrap up the zero-waste topic with a look at creatively using our scraps. I know I generate a lot of scraps with each and every project and am left with the decision, "keep it, or toss it?" each time. I'm excited to share one scrap-busting idea with you using scraps from up-cycled denim. I hope this inspires you to creatively use your scraps too!

More

]]>

Hi Everyone! In Part 4, we wrap up the zero-waste topic with a look at creatively using our scraps. I know I generate a lot of scraps with each and every project and am left with the decision, "keep it, or toss it?" each time. I'm excited to share one scrap-busting idea with you using scraps from up-cycled denim. I hope this inspires you to creatively use your scraps too!

How To Create Custom Patchwork Fabric

In this video I’m going to show you how to make your own fabric using scraps. There are many ways to do this, and many fabric and color combinations you could choose to use. For this demonstration I’m going to use a variety of up-cycled denim to recreate fabric inspired by the Dolce and Gabbana Spring/Summer 2021 collection.


To get started, you just need a few supplies:

  • Fusible Interfacing 
  • Iron
  • Pressing mat
  • Scissors or a rotary cutter/mat
  • And of course scraps!


Step 1: Determine the amount of fabric you’ll need to create based on the pattern you’d like to make. We’re going to make a blazer for an 18” doll using the Sofia Blazer pattern, so we need enough to cut out these pieces. Keep in mind that for this project you will likely cut each "Cut 2" piece on a single layer, so estimate enough space to place each pattern piece twice.

Step 2: Cut the fusible interfacing the desired size. You can also make this in sections, but you’ll probably end up with more scraps at the end!

Step 3: For my project, I’d like to have small squares of different shades of denim. Cut 1” to 2" strips using a rotary cutter, acrylic ruler, and mat,. Stack the strips and cut into 1”  or larger squares or rectangles. If desired, cut into several odd sizes if you want your fabric to look a bit more mismatched.

Step 4: Set the fusible interfacing rough (sticky) side up on your pressing mat. Place the fabric pieces, right side up, onto the fusible interfacing. Arrange them until you have a look that works. There’s no right or wrong way to do this - that’s the best part!

Step 5: Press, press, and continue passing the entire surface until all the pieces are secured to the interfacing. In the featured example, I am using a medium weight interfacing and a wool pressing mat. Pressing with a bit of steam, and the steam created by the wool mat really make all the difference!  Flip and press from the back side as well. Allow it to cool.

Step 6: Take this “fabric” over to your sewing machine and carefully sew around all the fabric edges. You can do this with a thread that matches or has a contrast -the choice is yours! Sew them precisely or with a random free form motion. I straight stitched along most of the straight edge lines, then (after cutting out each pattern piece) decided to go back over each overlapping edge with a zigzag stitch to crate a more flush uniform surface.

Step 7: Once the fabric is created, you can place your pattern pieces on it strategically and cut out all the pieces. I suggest basting around the edges of the cut piece, or finishing with a serger to keep everything in place as you construct your garment.

And voila! Your custom creation is finished and ready to display!


]]>
https://larougetdelisle.com/blogs/sewing-with-cinnamon/sewing-with-zero-waste-the-hooded-bog-coat 2021-08-17T07:33:19-07:00 2023-09-02T18:10:19-07:00 Sewing With Zero- Waste: The Hooded Bog Coat Cinnamon Miles In Part 3 we continue exploring the idea of zero-waste sewing with a look at the design of the Hooded Bog Coat. Follow along as Shari explains a little more about the design origins and shows us how to make the scaled down version for our dolls!

More

]]>

In Part 3 we continue exploring the idea of zero-waste sewing with a look at the design of the Hooded Bog Coat. Follow along as Shari explains a little more about the design origins and shows us how to make the scaled down version for our dolls!

Zero-waste sewing is not a new thing. Until the advent of textile mills, all cloth was woven by hand and was a very precious and expensive commodity. Because of this, clothing was designed to waste as little cloth as possible. Check out this 19th century cutting diagram for a man's shirt from the book, Cut My Cote by Dorothy Burnham. The only waste from the entire length of cloth was that little gray rectangle in the upper left - that is outstanding zero-waste design!

The general thought was, the less a length of fabric was cut and pieced, the more easily it could be adapted for other uses later on.

The design of the Hooded Bog Coat pattern that we will be featuring this week is based on a European design that dates back thousands of years to the Bronze Age. The Bog Coat, so named because the earliest examples of this coat design were found preserved in highly acidic peat bogs. These coats were cut from a single rectangular piece of cloth and shaped with three ingeniously placed cuts that were sewn together with two straight seams.

This simple design was very versatile. Worn with the opening in front, it could be cut long and made with a heavy fabric to make a warm and practical coat or it could be cut short and made with a fine fabric to make an elegant jacket. Turned around, the Bog Coat could be worn as a blouse or a dress. 

The Bog Coat has remained in use for thousands of years, and with the revived interest in Zero-Waste sewing, the design has found its way back into the fashion industry. We've seen many examples of this design featured in tutorials and magazines like this example from Threads.

The Hooded Bog Coat pattern that is featured in this weeks video follows the concept of the original Bog Coat with the addition of a hood. It is cut from a single rectangle of fabric with four cuts that will form the hood and sleeves.

Watch the video to see how it all comes together!


To make the coat, you'll need  a few supplies:

  • The Hooded Bog Coat pattern (available separately)
  • Rectangle of Woven Fabric cut to the pattern dimensions - for the 18 inch size that would be 18.5” wide by 21” long
  • Thread
  • Fabric marker
  • Three 3/8” buttons
  • Three small snaps are optional if not using working buttonholes
  • Scissors
  • Pins
  • Sewing machine
  • Iron and pressing tools

We'd love to see what you make! Share your projects with us in the Sewing With Cinnamon Facebook Group!

Next week we wrap up the topic with a look at making our own fabric from our scraps! Be sure to join us again next week...

    ]]>
    https://larougetdelisle.com/blogs/sewing-with-cinnamon/sewing-with-zero-waste-lets-sew-the-envelope-shrug 2021-08-10T08:22:11-07:00 2023-09-02T18:10:20-07:00 Sewing With Zero-Waste: Let's Sew The Envelope Shrug! Cinnamon Miles Hi Everyone! In Part 2 we will be exploring the idea of zero-waste sewing with an ingenious project design sewn from just one rectangle. Shari is joining us to walk us through the complete sewing process to make the Envelope Shrug for 18-inch dolls. Follow along and make a shrug for your dolls too!

    More

    ]]>

    Hi Everyone! In Part 2 we will be exploring the idea of zero-waste sewing with an ingenious project design sewn from just one rectangle. Shari is joining us to walk us through the complete sewing process to make the Thimbles and Acorns Envelope Shrug for 18-inch dolls. Follow along and make one for your dolls too!

    Here's a bit of background from Shari:

    Growing up, my family didn't have much money, so the art of making-do was simply a part of my being. My desire to dress in the latest styles like all the other girls was a big motivator for me to learn to sew. As I learned how garments were constructed, I found ways to remake garage sale clothing into more up-to-date styles. To fill out my wardrobe, I sewed new clothing from fabric gleaned from the clearance racks. I quickly learned that with a little ingenuity, I could rearrange pattern pieces in the fabric layout to save a little yardage or piece smaller pieces of fabric together to make a garment from fabric scraps.

    My experience has taught me to waste little, which is probably why I find the art of zero waste sewing so fascinating. This week, I am going to demonstrate how to make a zero waste envelope shrug.

    The design of this pattern is based on a 1950s sewing pattern that I came across last year that I adapted for dolls. This clever design is made with a single uncut rectangle of knit fabric with five ingeniously placed straight seams. The finished shrug can be fastened in the front to be worn as a blouse or left open to be worn as a light cardigan.

    To get started, you'll need to download and print out your copy of the Envelope Shrug pattern. Note: It was offered as a Freebie Friday pattern on August 7, 2020. We'd suggest you check your order history to download the pattern again if you aren't sure if you have this pattern.


    Then look over the supply list and instructions and follow along in the video to make the shrug.


    Isn't this an interesting project? We'd love to see what you've made. Be sure to share your pictures with us in the SWC Facebook group or directly on the larougetdelisle Inspiration Gallery!


    ]]>
    https://larougetdelisle.com/blogs/sewing-with-cinnamon/sewing-with-zero-waste-topic-overview 2021-08-03T11:39:11-07:00 2023-09-02T18:10:22-07:00 Sewing With Zero Waste: Topic Overview Cinnamon Miles Hi Everyone! Welcome to the topic, Sewing With Zero Waste. You might be thinking, "How do you sew without scraps? Is it possible?" Yes, you can! Not every time, but there are ways to do just that is the pattern is designed with "no scraps" in mind. Over the course of this topic, we will show you a few examples of zero waste designs; then we will wrap things up with a fun look at using those little scraps and turning them into cute design features!

    More

    ]]>
    Sewing With Zero Waste

    Hi Everyone! Welcome to the topic, Sewing With Zero Waste. You might be thinking, "How do you sew without scraps? Is it possible?" Yes, you can! Not every time, but there are ways to do just that is the pattern is designed with "no scraps" in mind. Over the course of this topic, we will show you a few examples of zero waste designs; then we will wrap things up with a fun look at using those little scraps and turning them into cute design features!

    The topic will be divided into 4 parts:

    • Part 1: Topic Overview and an in-depth look at what Zero-Waste Sewing is all about.
    • Part 2: Sewing The  Envelope Shrug
    • Part 3: Sewing The Hooded Bog Coat
    • Part 4: Got Scraps? Turn your scraps into unique and interesting fabric!


    What is Zero-Waste Sewing?

    Zero-waste fashion is when a garment (or accessory) is made without producing excess waste, with the purpose of making the most of the piece of fabric and reducing the amount of fabric that ends up in landfills. 

    The history of zero-waste fashion has risen in popularity in western culture in the last five years, but its extent is much further back historically. We can see examples of zero-waste ingrained in ancient cultures through garments like the Japanese Kimono and the Indian Sari. Both of these cultural garments are essentially cut as rectangles and then draped and manipulated to become their more recognizable forms.

    For most of history fabric has been expensive and difficult to come by, which made people want to maximize it’s use to get the most out of their money. This is essentially the mindset of zero-waste fashion. It wasn’t until the Industrial Revolution when this mindset changed. People began to mentally devalue textiles when they could be produced more quickly and economically. It became more acceptable to waste things and not use every last inch of it when it didn’t cost an arm and a leg to procure it.

    This mindset was amplified with the rise of fast fashion in the 1980s. Fast fashion refers to the apparel industry’s ability to quickly produce garments that are cheap and on-trend but shoddily made, horrible for the environment, and, more often than not, made by an underpaid and underprivileged labor force. Fast fashion is made to be worn today and thrown away as soon as the trends turn over.

    Sustainability (and with it zero-waste fashion) has become a valued attribute in the industry because our landfills are quickly overflowing with fast fashion.

    The Shocking Stats: It was estimated that in 2015 over 15% of fabric used in the commercial fashion industry ended up in landfills. Seeing as the commercial fashion industry uses approximately 400 billion square yards of fabric, that’s about 60 billion square yards of fabric deemed unusable in one year. This doesn’t even account for the amount of fabric that is thrown away by the consumer after they deem a garment unusable or unwanted. It’s estimated that Americans throw away on average 14 million and 17 million tons of clothes and textiles. Fabric in landfills can/will take up to 200 years to fully disintegrate and in the meantime let off greenhouse gasses and can leak chemicals and toxic dyes into our ground water systems. EEK!

    The Industry Response: In the last five years, the prominence and importance of sustainability has risen in the fashion industry. Zero-waste fashion has been a major development within the sustainable fashion movement in the last several years. Because the goal of zero-waste sewing is to use less fabric to create less waste, it is both environmentally friendly and economical to the consumer.

    How Zero-Waste is Achieved: There are two techniques for utilizing zero-waste strategies: zero-waste design and zero-waste production.

    • Zero-waste design is used in the design and cutting process of garment construction. The type of pattern pieces that are required and how they are cut can be crucial to creating a zero-waste (or at least less-waste) project (see optimization of cutting section).
    • Zero-waste production is implemented when a zero-waste strategy was not used in the design and/or cutting process and there are leftover scraps (see upcycling section). The ways to create zero-waste or reduce existing waste are infinite with just a little creativity and ingenuity!


    Achieve Zero-Waste Through Upcycling

    Upcycling is the foundation of the second zero-waste sewing strategy, production. The concept of upcycling comes from the ability of taking something old and breathing new life into it. This can be done by adding patches, reusing fabrics, and turning scraps into new projects. In order to make upcycling zero-waste, use already existing materials instead of searching out new ones. For example, using the fabric from old bedsheets to create unique garments is a great way to upcycle. If you have a shirt that you no longer wear but you can’t donate it because of a stain or hole, use the remaining good parts of it to create new garments for your doll. If you made a project and still have leftover scraps, turn them into headbands, purses, or even underwear!

    You could even use those leftover scraps and piece them together patchwork-style (kind of like a quilt) to create a one-of-a-kind textile to use on a pattern. Watch for our demo of this concept in Part 4.


    Achieving Zero-Waste Through Optimization of Cutting/Placement

    The first major part of zero-waste sewing is zero-waste design. For those of you who are fans of jigsaw puzzles this is a challenge you will love! An easy way to create zero waste (or at least less waste) is to optimize your fabric through pattern piece placement when using a standard pattern. Patterns nearly always provide cutting guides at the beginning, but that doesn’t necessarily mean you have to follow them. If you can find ways to tweak the placement of pieces to save space, then you can produce less fabric waste. You can even try cutting in a single layer rather than on the fold, thereby fitting more pieces in while still following the grainline. Try selecting a non-directional or a two-way directional print as these would allow you to place pattern pieces in different directions (upside down for example) so that you can better interlock your pattern pieces together.

    If you’re not using a standard pattern and are using a specifically zero-waste pattern, then placement and fabric choice become all the more important. A zero-waste pattern is typically made so that you only use a certain-sized rectangle of fabric. Some patterns have you cut out pieces with no scraps leftover, whereas other patterns might just have you cut seam lines into the rectangle. Either way, fabric print will be important! In order to make the garment not look off-kilter, choose a non-directional or a two-way directional fabric (although a non-directional print would be best for the latter type).

    Watch for us to demonstrate this concept in Parts 2 and 3 with the Envelope Shrug and Hooded Bog Coat pattern designs.


    Looking for a project to sew this week?

    Here's a simple project to get you started! With one long rectangle cut into a few smaller sections, you can create a cute little bolero style cardigan for your doll! Follow along to see how.


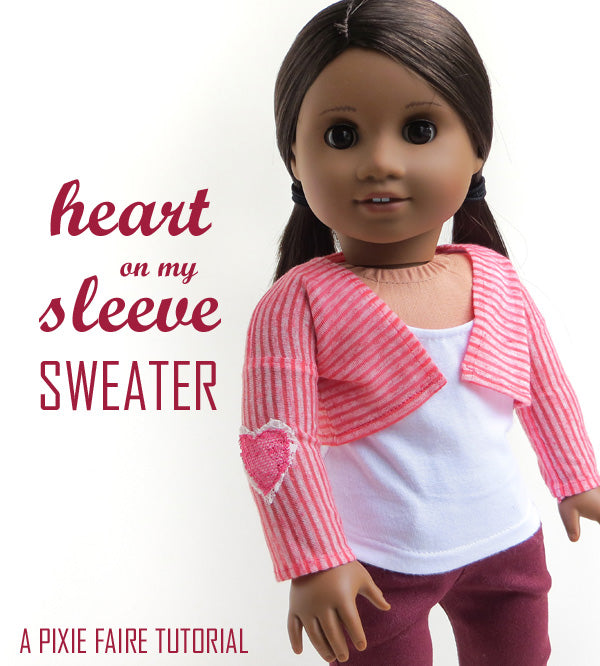
    Show your doll some love by making her this fun little sweater. It goes together super fast, and all it takes is just five rectangles...

    The tiny heart patch is an added embellishment, feel free to leave it off if desired.


    Suggested Fabric: You can use a stretch lace or a lightweight knit -- but in any case, your fabric needs to stretch a little to be sure it'll fit right.


    Cut ONE long 4-3/4" tall x  24" long rectangle.

    Cut it into these five rectangles:

    One for the back, 4-3/4" x 8"

    Two for the front, 4-3/4" x 3-1/4"

    Two for the sleeves, 4-3/4" square

    And, optionally, some little hearts, circles, or other shape out of coordinating fabric if desired for the elbows.

    To hem the Center Front edges, press under one long edge of each front piece 1/4" twice, to form a double-turn hem. Topstitch in place.

    Pin the fronts to the backs along the top edge. Make sure you have right sides together, and that the hemmed edges are facing each other.  Stitch, and then zig-zag along the entire edge (including the un-stitched section of the back).


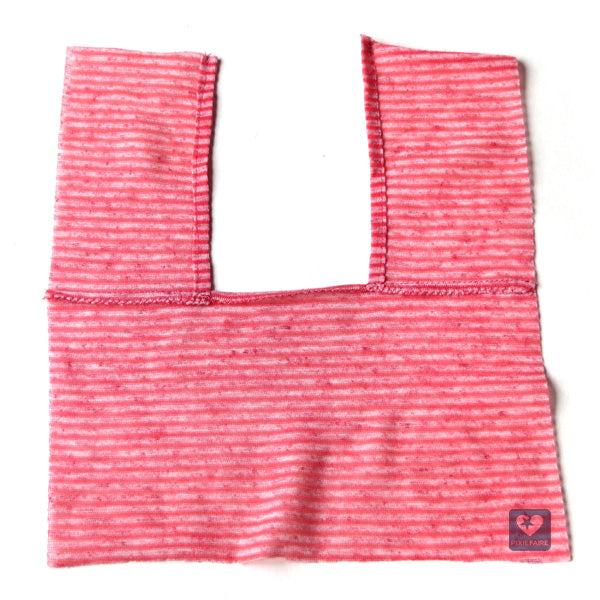
    Press both seams to the back, and then also press under 1/4" along the un-stitched back edge in between the two fronts. This will become the back neckline. Topstitch everything down nicely.

    Next, hem one edge of each sleeve. If you're using a stripe like me, go ahead and hem one of the edges where the stripes meet it vertically -- that way the stripes will be oriented in a nice direction on the finished sweater. 

    You can also stitch your little heart applique down at this point too, place it centered on the sleeve.

    Opposite the hemmed edge, mark the middle of each sleeve with a pin. 

    With right sides together, matching the pin to the shoulder seam, pin and sew the sleeves to the sweater body. Zig zag or serge over this seam when you're done. 

    With right sides together, fold the sweater in half at the shoulders, and pin and stitch the underarm/side seams. 

    Finally, hem the lower edge. Give the sweater a good press, and then style it into your doll's wardrobe! Share your projects with us, we'd love to see them!


    Next week, in Part 2 we'll take a look at sewing the Envelope Shrug. 

    ]]>