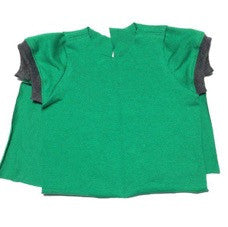
As winter transitions to spring, your dolls need some cozy new hoodies! Our guest blogger @graceloves2bake hacked the Weekend Wear Pullover Hoodie to create a cute and simple cropped hoodie and in excited to share it with us here on the larougetdelisle blog. It’s just short enough to be trendy and just long enough to be modest and warm! It sews up super fast and doesn’t involve hook and loop tape or a zipper!]]>
As winter transitions to spring, your dolls need some cozy new hoodies! Our guest blogger @graceloves2bake hacked the Weekend Wear Pullover Hoodie to create a cute and simple cropped hoodie and in excited to share it with us here on the larougetdelisle blog. It’s just short enough to be trendy and just long enough to be modest and warm! It sews up super fast and doesn’t involve hook and loop tape or a zipper!
Bonus Giveaway: Scroll down to the bottom of this post to enter to win a $50 larougetdelisle Gift Card!
What you need:
- Flossie Potter Patterns Weekend Wear Hoodie Pattern
- Knit Fabric
- Scissors
- Ruler
- Pencil
- Paper

Step 1:
Go ahead and print out your pattern. You only need to cut out pattern pieces #3 #4 #5 and #6A. Yes, you saw that right! You only need 4 pattern pieces!

Step 2:
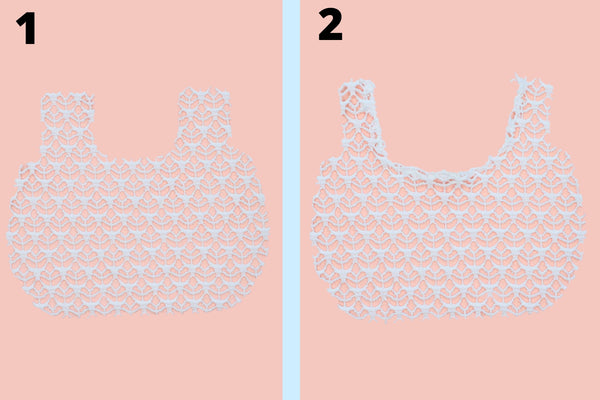
We’re going to be altering the pattern pieces now! Let’s start with pattern piece #3. Trim 3⁄4 inch off the shoulder seam and another 3⁄4 inch of the bottom hem. Next, trim 1 inch off the center and 1 inch off the neckline as well. This is now your front and back pattern piece.
Step 3:
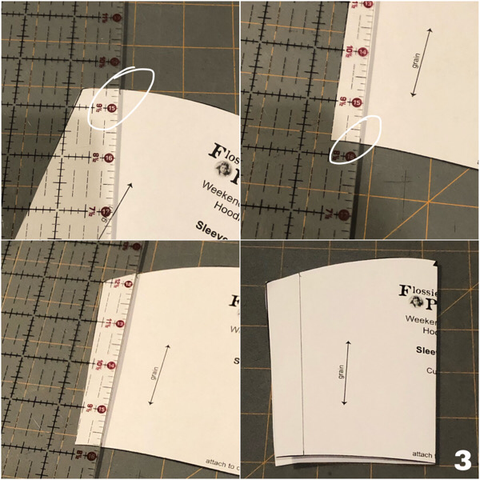
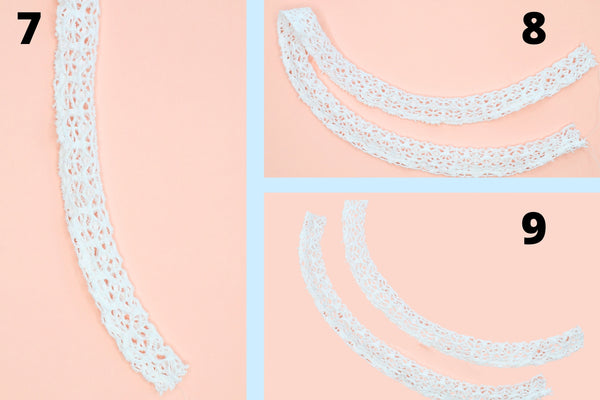
Let’s move on to the sleeve pattern pieces, #4 and #5.Take #4 and mark 3⁄4 of an inch from the side of the sleeve on the top edge. Then make a mark 1⁄2 inch from the side on the bottom of the sleeve. Use your ruler to draw a straight line connecting the two lines. Fold the pattern piece in half lining up the sides. Trim along the line you just drew. Now, take pattern piece #5 and trim 1⁄2 inch off the long side of the cuff.
Step 4:
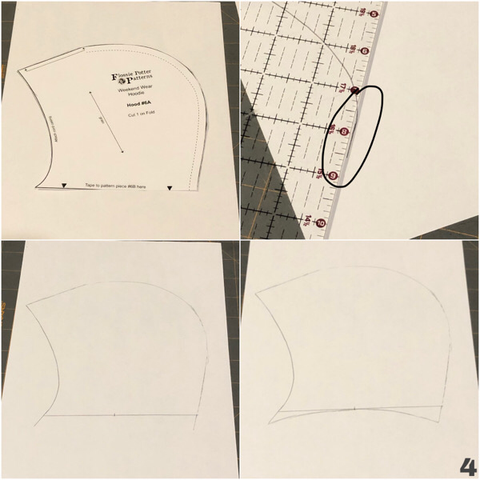
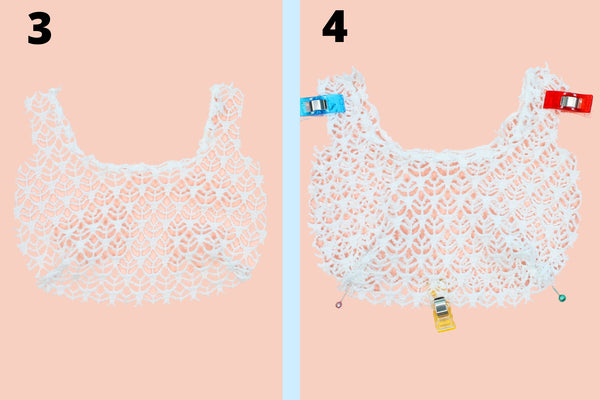
We only have one piece to go! Grab #6 and trace it on a piece of paper. Add an additional 3⁄4 of an inch to the bottom of both sides of the hood, being sure to follow the curve of the lines. Find the halfway point of the original bottom of the hood and make a mark. Connect the bottom of the lines and your fresh mark with curved lines. Cut out your new hood pattern piece!
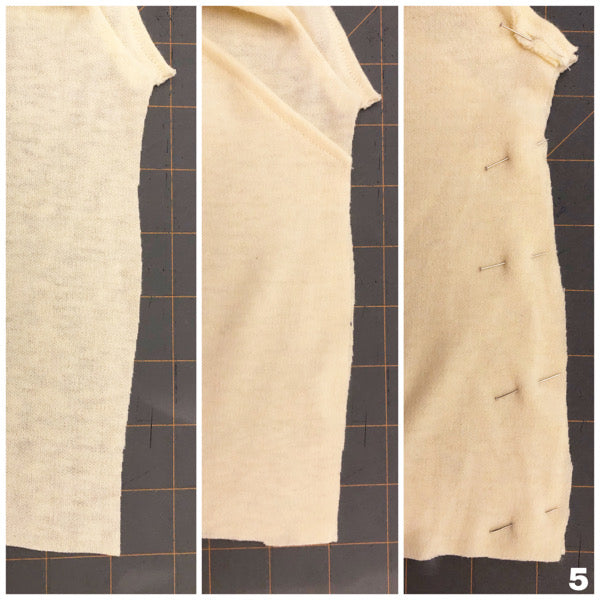
Step 5:
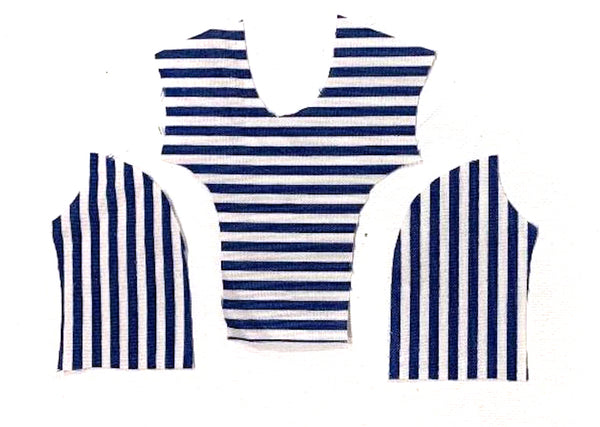
It’s time to cut out our fabric! You will need to cut #3 out twice on the fold, two copies of #4 and #5 just like the original pieces, and a copy of #6 on the fold.

Step 6:
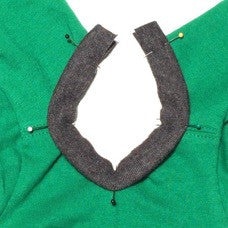
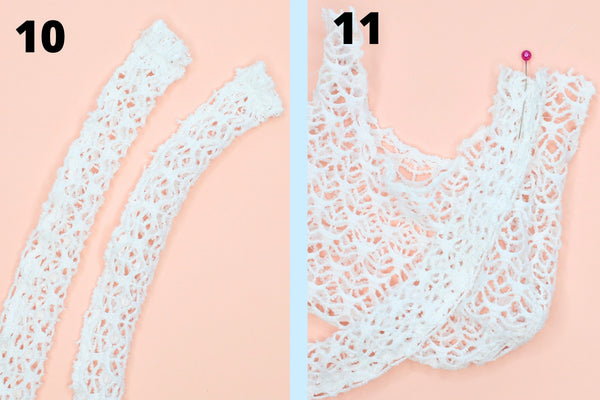
Let’s get sewing! Sew together your shoulder seams and then follow steps 6 and 7 in the original pattern to sew the sleeves. Sew up the back seam of the hood. Turn the opening of the hood up 1⁄4 inch and sew. Follow step 10 and 11 from the original pattern making sure to backstitch at the lower edge of the bodice on step 11.
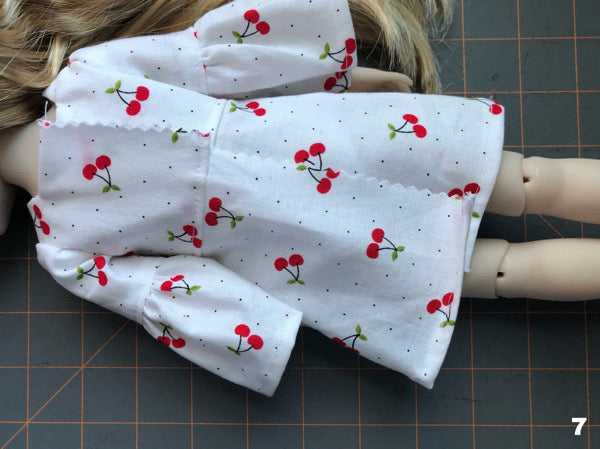
You're done! Now it's time to style your outfit to show off your new cropped hoodie!

We'd love to see your creations too, so if you make one, please tag us on Instagram @PixieFaire and @graceloves2bake
You can also share pictures in the larougetdelisle Inspritation Gallery right here on the website, either use the #pixiefaire when posting on IG, or just click the little + box to upload your picture right here on the website!
Thanks everyone!
For larougetdelisle, @graceloves2bake
ENTER TO WIN A $50 larougetdelisle Gift Card!
To enter this week's contest, simply click the link below and then enter through the giveaway widget at the bottom of the blog post, there are many things you can do to earn multiple entry points!
Contest Details: You enter through the entry form that is embedded on this page and appears just below this paragraph, if you don't see it, be sure to visit the page from your desktop or an alternate browser such as Google Chrome. It may not appear on all mobile devices. The complete rules and entry details appear on the entry form. This is not a comment contest - in other words, leaving a comment on the bottom of this page is not an official entry method. The only required entry method is to leave a comment under this post and then confirm that you did it in the contest widget. One person will receive the PF Gift Card. You can enter once, or gain multiple entries by completing the other entry methods and increase your chances of winning. Please review all Terms and Conditions on the giveaway page before entering. While we wish we could run this contest everywhere, for legal reasons it is only open to eligible residents of the U.S. and Canada, not including Rhode Island. This contest is exclusively endorsed by Liberty Jane Clothing and larougetdelisle.
a Rafflecopter giveaway
Commenting below and confirming your entry in the widget above gives you one entry method, the other methods are listed in the widget above, be sure to enter in as many ways as you can to receive the maximum amount of entries to win the gift card!
(This post and giveaway are not endorsed or affiliated with American Girl®, no endorsement implied.)
We’d love to hear from you. Please leave a comment and tell us, How would you style this hoodie into an outfit? Perhaps jeans, a mini skirt, joggers, or something else?
]]> The Carnaby St. Dress by Liberty Jane is So cute and versatile


 Hi, Everyone! Are you ready for another pattern hack of the free trendy t-shirt? This one is perfect for summer, it's easy to make, and it's doable in a variety of sizes - yay! This tutorial is brought to you by our fabulous content creator @graceloves2bake, read on to follow along as she shows us how to make a Wrap Dress from the Free T-Shirt Pattern.


 The Liberty Jane Cropped Sweater pattern is a 18" wardrobe staple, and with a few modifications you can use it to create a cozy turtleneck sweater-dress! With the help of a ruler, you’ll add extensions to the Front and Back pieces of the pattern to make it a dress, and a simple rectangle of fabric becomes a stylish turtleneck addition. Follow along to see how it's done...


 Hi Everyone! This week we have a super cute pattern hack that's perfect for welcoming Spring 2021! This blog post is brought to us from our newest content creator, @graceloves2bake from Instagram. We love her fresh take on the patterns we've published and her photos are the cutest too! So without futher ado...


 Surely by now you’ve seen a dress (or made one) from Buzzin Bea’s Wildflower Dress Pattern. It is sooo pretty and has so many fun options. Recently @forofsuch was inspired by all the ads for cute women’s dresses seen in her IG stories to make a maxi dress for her dolls!


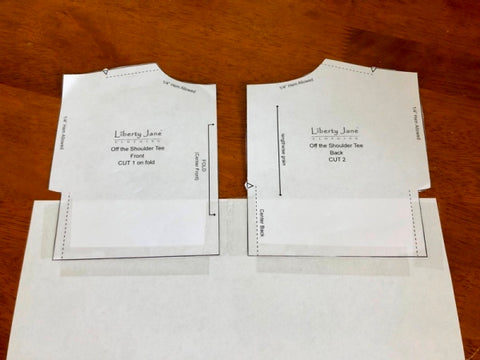
 Here's another fun look keeping with the 80’s fashion theme! Remember that iconic look when girls would wear an off-shoulder oversized shirt and a cool belt? This style was often paired with leggings and scruched slouchy socks, ankle boots, or those super stylish leg warmers! Well, this week we wanted to share a quick and easy pattern hack of the Liberty Jane Off Shoulder Tee pattern with you so you can bring this look front and center for our dolls eighties styled wardrobes!


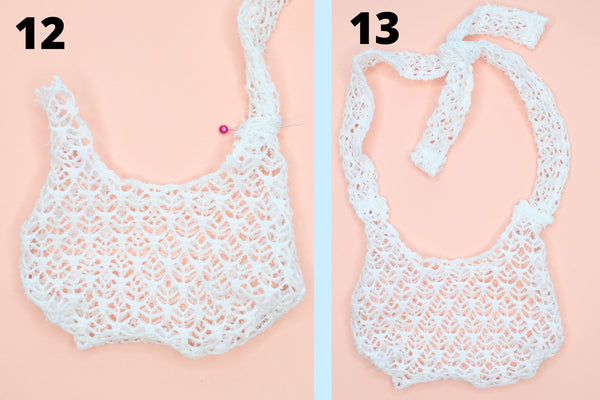
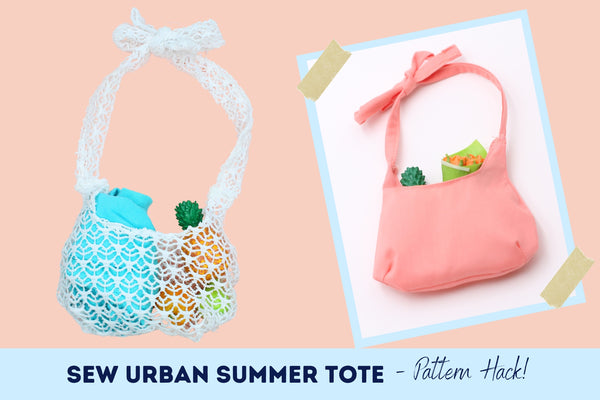
 Everybody needs a go-to summer tote- perfect for a trip to the beach, the park, or the farmer's market. This pattern hack of the Sew Urban Reversible Hobo Bag creates an easy casual bag that is unlined and has no hardware, making it great for a beginner project or something you can whip up super quick!
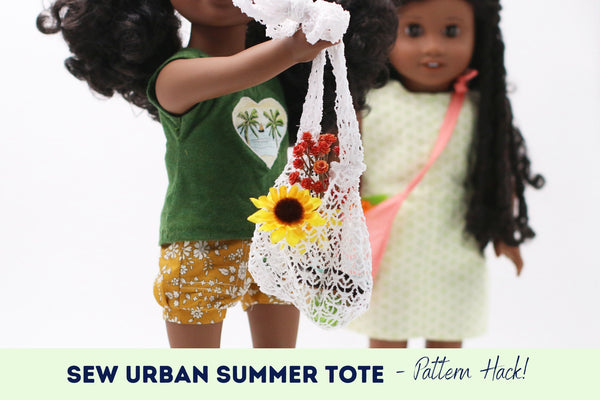
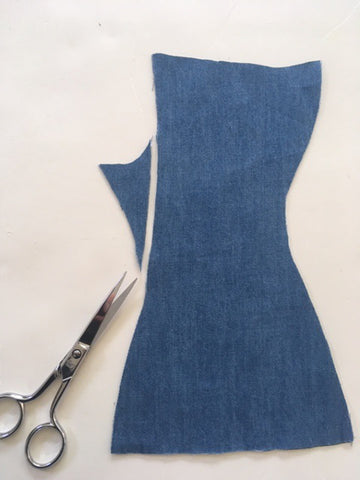
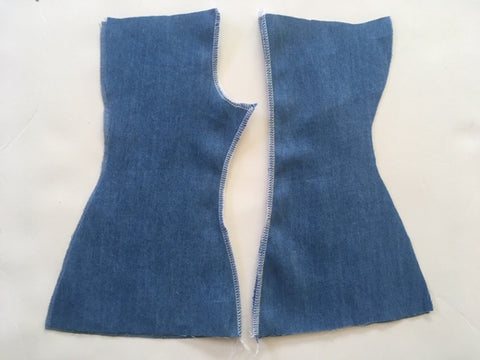
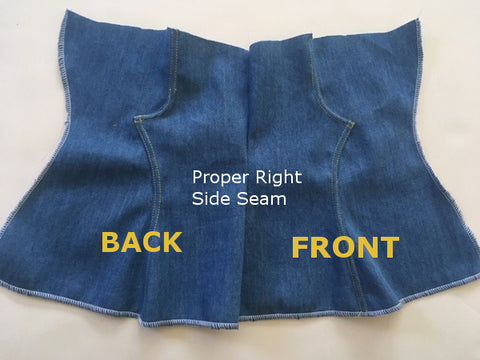
 3. Sew the two darts on both pieces, according to the placement on the pattern piece.


 Hello everybody! In this pattern hack tutorial, we are using the Crafty Lil' Turkey Dragon's Play pattern and adding a few tweaks to create a darling Unicorn instead


 Hello everybody! In this pattern hack tutorial, we are using the Little Miss Muffett Frilled To Bits pattern and by using


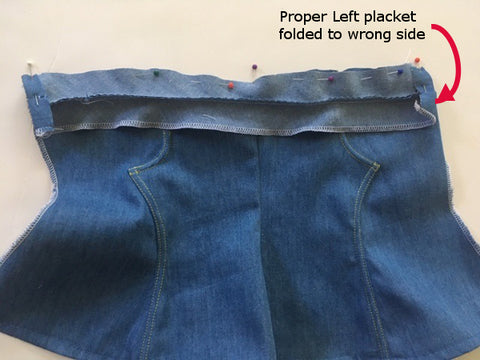
 ***These directions only take the place of "Step 3" in constructing the Forever 18 Inches "Vintage Playsuit Skirt." Please read through and follow all other directions in the original pattern, including steps 1 and 2. "Step 5" also has a modification when applying the waistband. More on that later on...


 Hello everybody! In this pattern hack tutorial, we add something new to the Bell Sleeve T-Shirt pattern hack to create a darling Ruffle Dress! Get your t-shirt pattern, some knit fabric, and your sewing machine - let's make a cute dress together!


 Hello everybody! This week's tutorial is a quick and easy pattern hack to the Liberty Jane T-shirt pattern! Bell sleeves are all the rage and adding one to your favorite tee is so easy to do! It transforms the look of an everyday classic into a piece with a bit of style and flair! Pretty cool, don't you think?


 Hello everybody! This week's tutorial is a super awesome, super easy pattern hack to one of our favorite Liberty Jane patterns - The Button Up Shirt! It's a classic design featuring several varieties of shirt styles for girls and boys! Follow along as we show you how to hack this pattern and make a cute dress for Back To School!


 Before you begin, measure your doll around the body just under the arms. If the measurement is 10½ inches or less, you are good to go. If it is more than 10½ inches, you will need to alter the pattern slightly to fit. Add an amount to the back of the top piece that is equal to half of the amount over 10 ½ inches. For example, if your measurement is 11 inches, the difference is ½ inch. Therefore, you would add half of that, ¼ inch, to the back of the top pattern. We need to do this because the swimsuit was designed for knit fabrics with a tight fit. To get a woven fabric to fit properly, we need to adjust the pattern.